So what scenarios have you played Recently?

Richard Weiley

Senior Member
Joined
Aug 5, 2004
Messages
623
Reaction score
389
Location
Sydney, Australia
Country
llAustralia
FT189 Severnaya Serenade Everything went right for the Germans in the first 3 turns which set me up to go for the victory. The bulk of the attackers crossed the river between hexrows N and G on board 40 and the two lightly defended VP locations on board 40 fell rapidly. The game turned on the battle over the last three turns to take the final victory location in 9H5. This turned into as back and forth slugfest as the Germans struggled up the hill in the face of enfilading fire from Hill 733 from the artillery piece and a Commissar directed firegroup and a reverse slope defence on Hill 654 itself. German casualties mounted rapidly. Just in time the Gun was neutralised and the Commissar fell to the sniper, relieving enough pressure for the Germans to secure the last needed victory location.

In the west the assault engineers served mainly as a threat to pin down the defenders in the castle. They did launch a forlorn hope assault in the last couple of turns to threaten the 9Y6 victory location but this met a predictable end in the "Valley of Death " around EE7/DD6.
 

volgaG68

Fighting WWII One DR At A Time
Joined
Jun 15, 2012
Messages
3,212
Reaction score
1,549
Location
La Crosse, KS
First name
Chris
Country
llUnited States
BFP-147 The Commissar's Folly.....My 41st PiF scenario, and not a whole lot to say about it. Just a straightforward battle between infantry/MGs, with the Russians getting one INF Gun. Good fun, just no exotic weapons/rules and all the wacky situations that usually arise from them. My first in-person, FTF game against a new oppo to the area, Steve Swann. ROAR had my Russians at 4:12 against Steve's Poles, but I like challenges like that. It came down to 3 CC/Melees in the final Polish 1/2 turn with me needing to win all 3. I lost 2, and Swann got the win. We thought, "Wow, that was more balanced than ROAR results suggested", and then a few minutes later realized that he (and I both) had forgotten to activate the 5 potential Dare-Death MMC he was granted by SSR. 🤣 Considering the moves I had gotten away with in the closing Turns, and the moves he didn't get away with, it would have been a total game-changer if he had activated some crazy 10M, Berserk DD squads. After that we decided the Russians might just need the Balance.

If you have 3-4 hours, and just want a straightforward beer & pretzels scenario, BFP-147 fills that niche nicely.
 

Houlie

CEO of HoulieDice (TM)
Joined
Nov 15, 2003
Messages
3,244
Reaction score
1,611
Location
Minnesota, USA
Country
llUnited States
Recently wrapped up OTO28 Desperate Bridgehead; a fine offering from BFP’s Onslaught to Orsha 2 HASL. The Russians Operation Bagration attack against a mixed force of defending Germans trying to take a riverside village OR clear all hills on board DW8 on the village (east) side of the river. The Russian commander opted for the straight-ahead push to the 7-building village VC.

The Russian OB featured 16 AFV (T-34, ISU-122, Su-76, Su-85), 20 squad equivalents, 82mtr. The Germans were a ragtag collection of 3 x StuG, 5 x Marder and a fleet of 7 x shiny new flakwagens of which two were the deluxe model 20FP flakvierling (one of which was hit by a SAN and recalled -- a significant early result). Personnel included 9x467. Additional tubes of destruction included 2 x captured 152ART, an 81mtr, 50L, 37L, 28L. All of which can (and did) inflict pain on the Russian armor.

Most of the German force was set up on the hills. The village started unoccupied with no troops save the HIP 50L and 37L. The Russian would seek to drive hard to get there before the Germans could fall back (if they so chose). I suspected the village would be sonewhat of a trap encircled by a ring of firepower from the surrounding hills as it sat in a “bowl”. Hills on all sides and the German commander knew it and wisely used it to his advantage. I felt the risk was worth it as the Russians OB was formidable and their numerous tanks could occupy the attention of the German guns. The infantry would bolt for the village.

Must’ve been turn ~3, a WDR generated a breeze that had huge implications on the game. Any burning wrecks would provide some cover for the Russians in the village who would be continuously pelted the rest of the game.

Russians drove straight up the center being cautious not to be careless with all of the HIP guns out there. A couple tanks and a couple squads entered the village proper by turn 4 where the 50L and 37L quickly showed itself and in CC KOed one bypassing Su-76 and then burned another on the road (Smoke!). However, the Knights Cross would be awarded posthumously as the 37L+crew was eventually eliminated in CC. The 50L (I recall) KOed another Su76, but the 50L crew broke on a 20+2 and routed to a village hex that I couldn’t interdict. Meanwhile, a 467/Pzk had safely sneaked into the village to the same protected location were the 228 would eventually rally. The Russians spent the next three full turns absorbing massive amounts of firepower from all sides. However, they were helped by smoldering Russian AFV wrecks and drifting smoke. In the final 1.5 turns, the Russians entered CC with a 10-1/458 versus the 467/228. They targeted and eliminated the 228 in the first round while the Germans missed. Next round CRed the 467. In the final CC of the game, they piled in two more squads and eliminated the 247 for a wobbly, nail-biting Russian win.

In the end the battlefield was a junkyard of Russian and German tanks – only four of the 16 Russian tanks remained: two of those (the Su122s) were immobilized by te hot-shooting 28L (albeit in a favorable spot on the village edge), an Su-85 with a malfed MA and a GO T-34 on the bridge. For the Germans, one StuG and one Marder (who survived an UK) remained. Several flakwagens also remained. More importantly, the 2 x 152ARTs remained with overheated barrels glowing orange.

We talked at length after the game and agreed the German was really hampered by the smoke. The only real German change would have been to have a squad (or two...or maybe a squad + dummies) in the village. As a historical lesson, this scenario evoked the futility of German Army Group Center defense in June 1944. Claptrap armor (Marders), vulnerable guns on halftracks with flimsy "0" frontal "armor" and unspectacular infantry having to defend against two Russian VC options (grrreeeat). The Russians artfully must trade steel and bodies for speed and space with heavy casualties nary a thought for the Russian commander. In the end, the recalling the 20FP flakwagen and the breeze were two key events that helped the Russian greatly. On the other hand, the hot-shooting German absolutely owned the Russian armor in this game, but was largely ineffective against the infantry which enabled them to gain the village foothold and close in on the small force there.

We played this over several weeks on VASL and it had many swings of luck/dice. Though, with a large scenario like this even a few bad events never put either side out of the game. If you are looking for a tight game with some different options and LOTS of action, I recommend this scenario highly.
 
Last edited:

waltermcwilliam

Senior Member
Joined
Oct 8, 2005
Messages
414
Reaction score
291
Location
Fayetteville
Country
llUnited States
Great scenario with the shit hiiting the fan from T1 and only getting more intense as you go.

Did that Tower come in to play at all? Can be hard for the Germans to get up there for Control.
No, I put dummies up there to draw fire power early on and the German's never really threatened it until it was to late.
 

Steve E7

Senior Member
Joined
Jan 25, 2007
Messages
672
Reaction score
301
Location
Wisconsin, USA
Country
llUnited States
Completed three scenarios lately, their variety showing off where ASL can take you.

SP250 - Dare Death and the Iron Division - China 1938

The Japanese are on the attack in eastern China with 9 squads and 2 tankette's. They have a choice of VC , take a large board 51 building or exit most of their force. My opponent chose a first turn banzai to drive on the building and it went badly. Most of the Chinese force was there, along with a 70mm ART gun and it, and their SSR given ability to launch Dare Death squads stopped the attack cold. The Japanese regrouped and tried to exit with the rest of the force, but did not succeed. This was a very fun early war China theater battle.'

AP 132 Night of Nights - Normandy 1944

My paratroopers landed in Normandy during the night of DDay. The drop went well, but man it was hard to achieve the VC. The US troopers need to achieve multiple VC, inlcluding eliminating German AA guns and building control , and it was not doable. Without a numbers advantage, and all the things night hindered the attack with ( straying, no firegroup, hard to control buildings with the night rout rules ) the Germans won. I would still suggest this scenario and am glad I played the US side as it was fun! But be ready for an uphill battle and the balance might be needed.

YASL 4 The Twin Pimples - Tobruk 1941

This Yankee ASL pack offering finds British commandos striking in the night versus two hillocks that the Italians are manning outside Tobruk. The commandos are not sure what OOB they are facing , but need to find mortars, ammo dumps, and control Hillock Summits to win, all without losing much. And that they did. They wiped out the Italian force pretty much to a man, and although they could not blow the ammo dump, they did find two mortar pits and plenty of CVP providing enough VP for an easy win.
 
Last edited:

waltermcwilliam

Senior Member
Joined
Oct 8, 2005
Messages
414
Reaction score
291
Location
Fayetteville
Country
llUnited States
BTB12 Going Against the Grain - Al and I played this last weekend and I had the Germans. I committed from the beginning to an exit VC strategy. I recommend not doing this, "It's a trap!", unless you opponent simply gives it to you. I succeeded in completely over running the smaller village but was bogged down, changed the axis of advance and died in the bocage. Brit win

BFP23 Prelim to Death Night - More bocage bashing this weekend. I attacked Tom's US on the left with a supporting attack down the center which, strayed to the right. My SS simply could not get wall advantage against the US final Bocage line, easy victory for the US
 

william.stoppel

Elder Member
Joined
Nov 10, 2004
Messages
1,287
Reaction score
901
Location
Northern Virginia
Country
llUnited States
Just finished up Gut Punch DftB141. Came down to the last CC phase and my last German squad a d leader held out for the win. Incredibly bloody game. My conscripts got lots of PF kills early to put the Russians a little behind. But any scenario that comes down to the last VC phase is a good one. Highly recommend this one. Now back to BoFs packs where I am 1-3 👿
 

Richard Weiley

Senior Member
Joined
Aug 5, 2004
Messages
623
Reaction score
389
Location
Sydney, Australia
Country
llAustralia
J147 Into the Grinding Mill. I think my initial setup was flawed and while the opening Japanese bombardments were relative ineffective (reduced, ELR'ed squad and a 6 minefield and MMG destroyed) I felt I was always on the backfoot as the Chinese force was steadily attritted and Japanese losses weren't that heavy.
I built a trench network in the village that was more or less a waste as the Chinese squads seemed to break everytime they exited a trench to enter a building and then the unoccupied trenches (a pet peeve of mine that trenches don't automatically connect to buildings) became relative safe avenues for the Japanese to exploit in their advance.
I did manage to put together a semblance of a defence with the reinforcements and held out until the last Japanese turn before my last squad in the victory area succumbed.
One little vignette to share - I used my tanks in turn 5 to move into the hexes of a japanese two tank platoon. This worked well at first as I prevented these tanks shooting at my skulking infantry and DM'ing my rally pointing and one Japanese tank malf'ed and then permanently disabled its MA. My infantry was abler to relocate and my now non DM'ed rally point was able to bring most of its units back in the next Rally Phase.
All this good work was undone immediately in Japanese Prep Fire as the remaining Japanese tank took out the Vickers in its hex with a critical hit. Turned its turret and firing out of smoke hit and destroyed the second Vickers, and retaining rate again turned and hit and broke everyone in the rally point. Such is ASL.
 

jimfer

Member
Joined
Feb 3, 2003
Messages
875
Reaction score
231
Location
Fort Worth Texas
Country
llUnited States
J147 Into the Grinding Mill. I think my initial setup was flawed and while the opening Japanese bombardments were relative ineffective (reduced, ELR'ed squad and a 6 minefield and MMG destroyed) I felt I was always on the backfoot as the Chinese force was steadily attritted and Japanese losses weren't that heavy.
I built a trench network in the village that was more or less a waste as the Chinese squads seemed to break everytime they exited a trench to enter a building and then the unoccupied trenches (a pet peeve of mine that trenches don't automatically connect to buildings) became relative safe avenues for the Japanese to exploit in their advance.
I did manage to put together a semblance of a defence with the reinforcements and held out until the last Japanese turn before my last squad in the victory area succumbed.
One little vignette to share - I used my tanks in turn 5 to move into the hexes of a japanese two tank platoon. This worked well at first as I prevented these tanks shooting at my skulking infantry and DM'ing my rally pointing and one Japanese tank malf'ed and then permanently disabled its MA. My infantry was abler to relocate and my now non DM'ed rally point was able to bring most of its units back in the next Rally Phase.
All this good work was undone immediately in Japanese Prep Fire as the remaining Japanese tank took out the Vickers in its hex with a critical hit. Turned its turret and firing out of smoke hit and destroyed the second Vickers, and retaining rate again turned and hit and broke everyone in the rally point. Such is ASL.
He should have bought a lottery ticket with karma like that! What a fire phase. Nice report.
 

Richard Weiley

Senior Member
Joined
Aug 5, 2004
Messages
623
Reaction score
389
Location
Sydney, Australia
Country
llAustralia
SmR1 Mired. I had the South Korean Marines in this game. My right hand company suffered heavy casualties at the hands of the 81mm mortar and the anti-tank gun firing from the Hilltop Defensive Perimeters. My left flank company had a shorter distance to go to reach the better cover of the village and more importantly my opponent was only able to get one OBA mission down before losing access.

This allowed me to close in on the HDP at The Knoll which I kept suppressed using the OBA. By turn five this position was isolated and only a squad manning an MMG in a bunker was still in Good Order.
When I advanced a 8-1 and squad into the trench in the hex and eliminated the MMG squad in CC my opponent conceded.

Not sure what to say about the balance on this one as I won in Turn 5 and the scenario is 9 turns long. Certainly if my opponent had better luck with his OBA the result may have been different. It seems to me that the HDP victory condition is the easiest one for the South Koreans to aim for and The Knoll is the most vulnerable of these to aim for, being only two hexes large and relatively easy to isolate.
Overall we both enjoyed the scenario and thought it was very evocative of the battle. Despite having both aircraft and OBA in play the rules overhead was not excessive and the scenario played pretty quickly.
 

Steve E7

Senior Member
Joined
Jan 25, 2007
Messages
672
Reaction score
301
Location
Wisconsin, USA
Country
llUnited States
Assault at Monkey Point - Corregidor: The Rock 1

This is a night action depicting the fighting after the Japanese had landed on the north side of Corregidor. A Japanese battalion is sweeping across the tail, arriving at Monkey Point to find Marines dug in waiting for them. The Japanese here chose to attack entirely down the West side of the board, effectively keeping half the USMC force under No Move. LOS is difficult to trace cross board. Their 16 squad force was slowed a bit, but had no trouble getting the 26 VP needed for a win. 7 turns to move across the narrow width of the board 37 was plenty of time, and while the USMC had some nice weapons and fortifications, it was an easy Japanese win.
 

Steve E7

Senior Member
Joined
Jan 25, 2007
Messages
672
Reaction score
301
Location
Wisconsin, USA
Country
llUnited States
Wrecking The Rentals FrF97 - Just finished this popular scenario , ending with a Russian win.
A bit of probing by the Russians found the "gap" in the board V woods mass through the plowed field fairly open, and the Marder was not HIP'd on that side of the map. The Germans entered their tank force, and promptly stopped in LOS of the Russians' Shermans. The armor battle swung the Russians way, and all 3 German Pz were knocked out, at a loss of 1 Sherman. That opened the door for the Russian armor to swing into the VC area pretty much unharmed, and while the infantry struggled to get there, the vehicles were all the Russian needed.
 

Houlie

CEO of HoulieDice (TM)
Joined
Nov 15, 2003
Messages
3,244
Reaction score
1,611
Location
Minnesota, USA
Country
llUnited States
Recently finished Hazmo4 Kids These Days from the inaugural Hazardous Movement scenario pack. Hazardous Movement is a new ASL startup led by veteran designers Chad Cummins and Chuck Hammond. The scenarios in this pack offer good variety and look quite interesting. Rich Domovic and I decided to give this one a try. It pits the Brits versus SS in a unique design that lets both sides attack and defend, with a VP mix of location control for both sides AND EVP for the SS. A total of 40 VP are needed for German victory.

The Germans start with a small ALL HIP 6x658 holding force with a 75L to prevent the capture of two fortified village stone locations by the end of British player turn 6. The reward for their defensive success is 15 VP. Brits started on board with 3xShermans, 15x 7/8ML squads. Reinforcements also add a few squads, 57L and the OBA radioman.

The British advanced en masse with zero stacking knowing some careless early losses could hurt the chances of denying the German those 15 mid-game VPs. Overall, the Brits did a nice job of avoiding losses, but did lose a Sherman on a 75L ACPR shot. A stubborn 658+MMG made itself a pain, but was finally eliminated in CC. Both fortified locations were found and one location contained a 348 so was able to engage it (and win) in CC. The other location contained an encircled 658 who broke in British turn 6 on a 12+2 freeing up the ability to advance in to deny those oh-so-important mid-game VP.

The next phase of the scenario sees a gaggle of hard-core SS enter as reinforcements. Notable assets included: 3x Tigers, 1xStuG, 3xhalftracks (HTs), 81mtr, 10x658, 80mm OBA. The bulk of the infantry were tasked with the game-end goal of recapturing both fortified locations seeking to gain the game-end 15 VP. The Tigers, StuG and HTs would provide the EVP fist. Three HTs each with a 658 entered on the German right flank. A Sherman KO’d one on an IF, though the 658 survived. The Sherman then took a projectile from a Tiger which scored a turret hit (Sherman was behind bocage).

German OBA smartly placed smoke in the village to cover the infantry advance. Meanwhile, two Brit MMGs tried to KO the two other HTs from behind the tangled bocage with no success. However, what those MMGs couldn’t do, the OBA did for them. Accuracy dr was…accurate and landed on the two HTs. Results were an immob and a Shock (next rally turned to an UK). By this time, possibly all 15 HT VPs + 4 VP of passenger infantry could well be out of the EVP festivities. In light of the OBA impact AND the fact that four GO tubes (3xM4 + 57L) were lubed and trained on the probable axis of exit -- plus 2x247/PIATs had a solid bead on the board edge exit channels. As a result, the German commander called off its attack in order to regroup for a renewed attack the next morning.

We had a good discussion about this scenario afterward. One reflection from the German side was keeping the bulk of the initial defense near the village with a few well-placed pickets. Also, consider keeping the fortified stone locations as far away from each other in the village as you can. It stretches the attacker who will lose some squads getting to the village. Finally, keeping the HTs out of leading edge of the attack is key. If they are carrying passengers each one lost could be up to 7 EVP not exiting the board. Their mobility to exit is huge. On the British side, making sure tubes (and manned PIATs) stay alive and are well-placed is critical to always have an opportunity to zing a tank trying to exit. Too, remember deliberate immob as an option against a stationary Tiger. A DI is as good as a KO in this one.

We both really liked this scenario a lot. Even as an 11-turn scenario, both sides had to be assertive to achieve the mid- and end-game objectives, but there were multiple options on how this can be accomplished. This was another plus, which we saw providing high replayability. For me, this scenario felt very Fortenberry-like. A tricky puzzle that is as much fun to suss out as it is to play. Very, very enjoyable. A huge thank you to Rich for another great game!
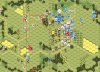
Final board
18848
 

VonHutier

Senior Member
Joined
Jun 6, 2021
Messages
615
Reaction score
462
Country
llUnited Kingdom
Did "Chocos" last week, an excellent, short scenario; Japs lost only on ( their ) last move, a large CC in the wooden huts: highly recommended..

Up next "Sting 'em at Zingem"...
 

william.stoppel

Elder Member
Joined
Nov 10, 2004
Messages
1,287
Reaction score
901
Location
Northern Virginia
Country
llUnited States
John and I played DB143 Road to Destruction last night. I call this one the Maus-lite scenario as it is smallish and features a Maus. This playing ending rather quickly. Started out well for my Germans as a 2-3-7 scout h/s survived a 4-2 and an 8 flat shot looking for the 100L AT gun. Ended up breaking before he could hop into cc on a 5+2 shot. Oh the irony. Unfortunately surviving the 4-2 shot activated John’s sniper who sent home early my Flak PzIV/37 before he could setup his hilltop overwatch position for the FBs that may or may not arrive. Sniper then broke the accompanying squad to run salt in the wound. 100L then popped out and flamed my h/t and I was now down to the Maus with a conscript rider and two 6-5-8’s with leaders. John’s random reinforcements entered with a pair of captured PF’s. Turn 2 the Maus moves and places smoke to support the infantry but is immob’d on a DI shot from the 100L. Needed a 6 in the hull and got a 6 in the hull. Game over. Cool scenario with the Maus and all of the random Russian reinforcements. Perfect precursor to the Mighty Maus V2 scenario!
 

gorkowskij

Senior Member
Joined
Jan 23, 2020
Messages
167
Reaction score
510
Country
llUnited States
Cavalry Brigade Model, BoF 6

This swampy Russo-German tangle begins with a daring high stakes cavalry thrust, but then devolves into kabuki theater. German cavalry supported by two tanks aim to penetrate and encircle a robust Russian infantry defense bolstered by 76mm gun and a one-man-turreted T60 tank before the Russians can fall back on “the rally point.” Said rally point is known only to the Russian player, but making it public might have been better. That’s not sour grapes; my Germans won, but the “confidential” nature of the rally point generates a bug hunt feel that undermines the blitzkrieg rush I prefer.

The fun opening featured a sacrificial cavalry scout stripping enemy concealment, AFV sleaze freeze (overrun is also an option), smoke, and pointblank fire as my Germans used orchard to screen their six cavalry squads who dismounted to fight as dragoons on the turn of entry. Bill’s Russians fought back with respectable defensive fire, including ATR fire at vulnerable German tanks. I lost two half squads, had another ELR, and a leader broke, but managed to crack the Russian center. A turn of catch-me-if-you-can followed as he skulked and I chased deeper into the Russian center. By mid-game, a few German squads had hooked around the Russian positions and five more came in from the opposite board edge to close the door.

Then the Germans had to wonder, “Which of the two Russian toeholds in the rally point area might be the one true rally point, or is there a third option as yet unclear?” That may sound intriguing, but its tedious in practice, for both players. Since I already and unknowingly occupied his rally point, Bill strained to deceive me, and inadvertently tricked himself. Meanwhile, I dutifully tightened the noose on his two toeholds, one of which would have been a really tough nut to crack. Then, after his last movement phase, he revealed the truth and we both thought, “Meh.” It seemed anti-climactic.
 

Philippe D.

Elder Member
Joined
Jul 1, 2016
Messages
2,139
Reaction score
1,395
Location
Bordeaux
Country
llFrance
Finished a VASL playing of KGS4 From Matilda with Love this week.

Cholm, Deep Snow, Extreme Winter with Ammunition Shortage level 2... this is a great scenario to get a feel of the KGS module. Germans are spread thin and have to defend a long line with MGs that malfunction when you sneeze at them. Russians feel strong, but have to cross lots of open ground (in the snow) to get at their objectives, and have little space to grow concealment to use with their Winter Camouflage. Add some OBA and a dash of lend-lease Matildas (hence the scenario name).

The game was pretty one-sided, mostly because the German player had set up way too many squads in a very vulnerable position, where they were quickly overrun by the Russians. This meant the remaining Germans were really spread extra thin, with no hope to reposition efficiently (remember: deep snow, lots of open ground - and these Matildas had a nice 6FP CMG so running in front of them wasn't too appealing). Plus, the German OBA only managed to get a single fire mission, and not even a very effective one.

Still, we enjoyed the game a lot. Gives a great feeling for the module.
 

VonHutier

Senior Member
Joined
Jun 6, 2021
Messages
615
Reaction score
462
Country
llUnited Kingdom
Played "The Commisars House" today, a personal favourite; German win, but only after I managed to burn down ( mostly ) the wooden rubble VC hexes; my opponent graciously conceded, I think he was generous though as it was still all to play for with 3 German moves left..
 
Top