Hi all,
OlFezz and I were playtesting a new "Pooch" Puccio scenario for the
new Dispatches. It was my first glider scenario, after 30+ years of
ASL play. In discussing the scenario afterwards, Pooch mentioned that
it was the end of his Operation Varsity scenario. The new one was
so much fun that OlFezz and I are going back to play Pooch's first
two scenarios in the series.
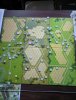
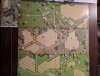
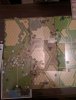
First up is DB093 Thunder from Heaven, from Dispatches #33. BIG scenario.
26 American paratrooper squads paradrop on Turn 1, 13 British glider squads
enter on Turn 3. Initial German forces are 10.5 squads + 3 light AA guns.
Wire and mines and a fortified building help the defense. Germs get
reinforcements on Turns 2-5, 6 squads + a Stug + 2 HTs, and also 2 random
platoons + transport/light AFVs, which enter on a random road hex on the
north or west or southwest edge. 9.5 turns. Pretty rules heavy, paradrop
(my first!), gliders (my second), RCLs, drift procedure to place random
smoke, wagons.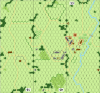
OlFezz and I were playtesting a new "Pooch" Puccio scenario for the
new Dispatches. It was my first glider scenario, after 30+ years of
ASL play. In discussing the scenario afterwards, Pooch mentioned that
it was the end of his Operation Varsity scenario. The new one was
so much fun that OlFezz and I are going back to play Pooch's first
two scenarios in the series.
First up is DB093 Thunder from Heaven, from Dispatches #33. BIG scenario.
26 American paratrooper squads paradrop on Turn 1, 13 British glider squads
enter on Turn 3. Initial German forces are 10.5 squads + 3 light AA guns.
Wire and mines and a fortified building help the defense. Germs get
reinforcements on Turns 2-5, 6 squads + a Stug + 2 HTs, and also 2 random
platoons + transport/light AFVs, which enter on a random road hex on the
north or west or southwest edge. 9.5 turns. Pretty rules heavy, paradrop
(my first!), gliders (my second), RCLs, drift procedure to place random
smoke, wagons.