GRENADIER´17 ASL Tournament, Germany, 01.11.-05.11.2017

von Marwitz

Forum Guru
Joined
Nov 25, 2010
Messages
14,387
Reaction score
10,291
Location
Kraut Corner
Country
llUkraine
YASL 2 – Initial Skirmish vs. Sebastian Hummel

Wednesday Afternoon – Friendly Game

YASL2 Initial Skirmish Scenario Archive.jpg


Set in 1940, the Germans need to inflict more CVP than the French while each captured buildings also earn VP. The Germans have a quick force of some early PzII's and PzI's that are supported by Kradschützen on Motorcycles and Sidecars. The terrain arcoss which they have to approach gives some cover by grain and brush but there are not many places of Rally terrain. The French only have modest AT capabilites consisting of an LMG, an ATR, and a not to be underestimated 37* SW INF Gun. As best the German AFV have to offer is an AF of 1, they cannot be careless because losing tanks ist costly. The French on top will receive two radioless AMD 35 Armored Cars with one 8-1AL which are quite potent in the given context. As a special balance, the French were given a 6th 4-5-7 Squad.

I played the French in this one in a friendly game as a preparation for a mini tournament the following day. All in all the resume is that I diced the living hell out of my poor opponent. 3's and 4's abound which are, of course, hard to digest in a 4.5 Turn scenario.

The result was a French win for me.

von Marwitz
 

von Marwitz

Forum Guru
Joined
Nov 25, 2010
Messages
14,387
Reaction score
10,291
Location
Kraut Corner
Country
llUkraine
YASL 2 – Initial Skirmish vs. Bruno Nitrosso

Thursday Morning – Mini-Tournament Round 1

YASL2 Initial Skirmish Scenario Archive.jpg


The first scenario of two of a themed mini tournament of early war Germans vs. the French, this time, I played the attacking Germans.

The early moves of my Infantry & Motorcyclists were met with fierce resistance by the French which led to some losses and breaks. This proved to be the theme of the game: My Germans were always short of infantry. I moved the tanks with caution rather than dash to preserve them as good as I could, especially, since the lack of infantry would not have sufficed to cover armored exploits.

The French ACs moved in from the back and took up a good position centrally in the village. Generally, the French infantry succeeded pretty well falling back in good order in the beginning. While my original plan was to set my Schwerpunkt on the German right side, I turned out to concentrate in the center. From there, I gained the first foothold in the middle outskirts of it. Because the French ACs were within the village, I was able to shift my tanks to the left in an effort to take out the French flank there and to seperate that part of the village from the rest. Again, there were some setbacks of my infantry which did not appear to manage anything.

The tanks firing Point Blank did begin to tell, though. And in the center of the village, I was slowly making some progress. Then the French ACs managed to take out two Germans tanks. At this point, I had not much confidence in bringing this home. But at long last, on the German left, the French infantry was cleared and Landsers grinding forward from house to house. Meanwhile the French had successfully retreated behind the road within the village.

The 4th German turn brought about the change. I was able to corner two French squads freezing them and afterwards to close in with German Infantry. Both French squads broke and the chivalrous Germans happily accepted the Prisoners as a welcome CVP increase. At long last, a German hero with the ATR succeeded in taking out one of the AC's after something like half a dozen attempts. During the French turn 4, the French retaliated in eliminating a PzI, but the could not harm the German infantry.

The last German half-turn allowed me to grab four more buildings and to extract one PzI by reverse moving out of harm's way. Still, CVP & buildings were in French favor. In preparation for the last CCPh, I had to dash some German infantry across a road hoping to have some reserves to attempt their PAATCs vs. the surviving French AC. The outcome would hinge on its survival or demise. The German squad broke, the Prisoners were CR'ed which luckily counts still in favor of the Germans.

Fortunately, that AC had been shocked before. A 9-1, 467+Prisoners, and a HS+Prisoners (IIRC) all made their PAATCs. They just managed to kill the AC, which also held the French AL. At first we calculated that both the French and the Germans would have 27VP. Then, we remembered, that eliminated own Prisoners by the French still count double for the Germans, turning it into a German win for me by the barest of margins. A hell of a game!


von Marwitz
 

von Marwitz

Forum Guru
Joined
Nov 25, 2010
Messages
14,387
Reaction score
10,291
Location
Kraut Corner
Country
llUkraine
FrF77 Ghostbusters vs. Armin Deppe

Thursday Afternoon – Mini-Tournament Round 2

FrF077 Ghostbusters Scenario Archive.jpg


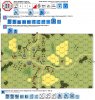
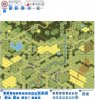
In this 5 Turn early war scenario of attacking Germans vs. the French, the former must quickly rush a considerable force of VP value into an area quite deep in the French field. The Germans force consists of 3 Panzers of the PzVIC&D variants and a PzIIF accompanied by elite Motorcyclists & Sidecars. In German Turn 3, two more 8-Rad PSWs enter as reinforcements.

The French have a 25LL AT Gun, a 37* SW INF Gun (which may HIP by SSR) and a MMG, LMG, and 60mm MTR each. The real killers are two Laffly W15T CC trucks equipped with a 47L gun that sport a TK of 11 that both may set up HIP. The problem for the French is that with 10 squads and only two leaders, they need to cover quite a wide area that contains considerable grain hindrances. Basically, there are two approaches the Germans can take: The first would be pushing through a village, the other would be pushing through a valley.

As my opponent set up strongly in the village and did not use the option to have some French troops (except for a AMD35 AC reinforcement) enter during turn one instead of setting them up on board, I elected the way through the valley.

I would attempt to freeze some forward French units with tanks, then see how far I would get with the Motorcycles and Sidecars and afterwards move the remaining tanks to put pressure on any French units that would have revealed themselves hoping that they would not get hit by anything serious.

This plan worked out quite well with numerous Motorcyclists/Sidecars and a few tanks reaching the valley. Furthermore, I could take care of frozen French infantry by moving up and dismounting some Motorcyclists or corner them in a way that would make retreat precarious. With a bit of luck, I was able to advance into CC what „smelled“ like a lone leader and indeed turned out to be the French 9-1 who was killed. The loss of the best French leader in the first halfturn out of a total of only three available surely was a blow.

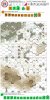
With the „central woods“ under control early, I used the second turn to consolidate and move up more units to the far edge of the valley while the French had had his hands full to fall back from the forward village area to get into my flank when my Germans would have to exit the valley.

Exiting the valley as the Germans is probably the most difficult thing for the German in this configuration of the scenario to pull of. I suspected that at least one Laffly and one of the less dangerous but by no means unperilous AT-assets would lurk on board 62 somewhere waiting for just that to happen.

Some German infantry, I had moving through the Board 62 woods on the boardedge side to take care of the few French units that protected the flank there and of which I rightly suspected that they weren't supported by a leader. This was a prerequisite for getting the German infantry to the larger board 62 woods more in the back across more open space.

The clearing with the road within the large backward woods was my overall objective as the trees would screen my AFVs and would provide cover for any German infantry that made it to there. The latter would protect my AFVs and help to fend of French infantry, that would invariably attempt to get into the woods and to my vehicles.

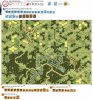
Turn 3 and 4 saw the Germans exiting the valley and hastening to the woods. During Turn 3, many French were still in the process of redeployment and the Germans were partly able to clear the forward board 62 board-edge woods. I parked a few tanks close to the farther backward board 62 woods in preparation to engaging the French infantry that would attempt to deny German infantry the crossing into the backward board 62 woods. Unfortunately, a number of them were parked just ADJACENT or very close to one of the French Laffly-Trucks. Uh-oh...

The cursed Laffly opened up to kill one of the non adjacent PSWs and kept ROF. Then it engaged the ADJACENT Pz IVD – and malfed his Gun... Phew! This Laffly was soon after dispached of by the ADJACENT tank and some other German units. IIRC, another German tank was killed by the second Laffly further in the back, so it would become more difficult for the Germans to collect the needed VP for which surviving AFV are essential. A third German tank, who had reached my objective, was killed by the French AC which had driven that way in Turn 2.

At this point, the German situation was precarious: With the French AC in my target area alive and kicking and my vanguard tank there dead instead of the other way around, I figured, that it would be too dangerous to move more AFVs in there at that time. Furthermore, French Turn 4 saw a lot of their infantry taking up positions to hinder my infantry crossing into the backward board 62 woods. Luckily, the surviving Laffly was not interfering with his Gun but opted to leave the board upping my VP requirement by an additional 3.

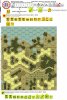
I decided for a change of plans. Instead of driving my remainng tanks into the protection of the woods, soured by the presence of the French AC, I turned them around to frontally attack and overrun the French infantry on my flank that would prevent my German infantry from crossing into the backward board 62 woods. As the French infanry was Grain or Orchards at best, I was able to wreak quite some havoc and to place some Smoke by sD. This allowed a substantial portion of my infantry to make it safely into the backward board 62 woods and hopefully to protect the back of my remaining AFV against the French AC.

The French AC sortied out of the woods to get at the back of my AFV, survived numerous MG TK shots but was finally killed by one of the AFVs before causing any damage. It might have been better to just leave the AC where it was. The French infantry tried to kill at least one of my tanks with MG or in CC but luckily failed.

German Turn 5 saw the remaining AFV to pull back into the protection of the now safe backward board 62 woods and to stop there to fulfill the VC requirements. The French had no choice but to run towards the woods and attempt to get though to some of the vehicles to kill units and thus lower my VP total.

This proved futile, however, as now the edges and area between the French and my AFV were firmly held by German infantry.

A tense game that could have gone both ways in Turn 4 especially.
A fun scenario that I can heartily recommend.

My German win also gave me victory in the mini-tournament.


von Marwitz
 

von Marwitz

Forum Guru
Joined
Nov 25, 2010
Messages
14,387
Reaction score
10,291
Location
Kraut Corner
Country
llUkraine
FT183 Partisan Stronghold vs. John Martin

Friday Morning – Main Tournament Round 1

FT183 Partisan Stronghold Scenario Archive.jpg


It was determined that John Martin would be my opponent for the first round of the main tournament. He is a very nice chap and a verteran of Grenadier tournament that I have always had fun talking to but up to now not actually played against as far as I can recall.

I had the defending Partisans in this one while John had the Romanians whose task is to root them out from their stronghold. A special balance for the scenario gave the Romanians an extra DC regardless of bidding.

Snow is falling in this scenario at start, which protects the Partisans somewhat from the Romanian Gut that must set up on a level 4 hill in the backfield which, however, provides it with a surprisingly good field of vision because many blind hexes are reduced by the height. The Partisans lack firepower but have a 9-2 leader and a Hero along with a Fortified Location and a tunnel originating from it. These are the Partisan's biggest assets along with MOL capability, that cannot be used, as we need to recall, across directly attached woods hexsides – which is often forgotten but of relevance in this scenario as it limits their use somewhat.

The Rumanians have 11x 447 squads (opposed to the 7x 337 of the Partisans), a HMG (which was exchanged for a MMG due to John's bid), a LMG a 60mm MTR and 2x DC along with the 75mm Gun on the hill. This assures, that the Partisans can't afford to stand up to the Romanians directly.

My plan was to slow the Romanian advance by a token force, pull back Partisan squads that were required by the setup instructions to place some units in a number of buildings and remain out of sight as much as I can. The Tunnel would provide me with an escape- and reinforcement route to my Strongpoint (Fortified wooden building) to a place out of sight in the back of some woods.

As was to be expected, there was not much I could afford to put up in the way of delaying the Romanian approach. The Romanian maneuvered the 60mm MTR into a favorable position that was to cause me headaches unit it finally malfed.

Closer to my stronghold, resistance naturally stiffened. I was able to deal out some damage, but the Romanians are numerous. When I attempted to place a DC on a Romanian squad with my Hero, the latter was forced to roll some MC after a 2-0 RFP attack. Fate struck harshly with boxcars, eliminating the important Hero and dropping the DC before the feet of the enemy...

It got worse when the 60mm MTR (IIRC) scored a CH on my strongpoint. The 9-2 broke along with everyone else in there. Something the Partisans simply cannot digest giving the few squads and the lack of room for maneuver they have. I had most brokies successfully rout through the Tunnel and replaced them with what meager means were available. The core of my defence was severly compromised without the 9-2 and the Hero, though, and I lost an important turn where I could otherwise have dished out. Eventually the 9-2 recovered only to break once more with the remains of the Partisans in the stronghold.

Knowing what fate would await them if they surrendered (SSR specified that any Prisoners taken by the Romanians would count against them), the Partisans fought on fanatically until the last theoretical chance for victory was dashed. I lost, the Romanians won.


von Marwitz
 

von Marwitz

Forum Guru
Joined
Nov 25, 2010
Messages
14,387
Reaction score
10,291
Location
Kraut Corner
Country
llUkraine
WO12 Heart of Wilderness vs. Armin Deppe

Friday Afternoon – Main Tournament Round 2

WO12 Heart Of Wilderness Scenario Archive.jpg


Despite Armin also being a veteran of Grenadier Tournament, we had never played each other before except yesterday in the Mini-Tournament. Now he would have his chance for a revenge.

My first choice for this round was CH6 Armored Probe, his was FrF67 Collechio, so we ended up with WO12 Heart of Wilderness. This is not to say this is a bad scenario – on the contrary – it turned out to be my favorite scenario of the event. Not being among the fast players, I was concerned that it would take a ton of time as it includes 16 German and 30 Russian squads and a lot of fortifications to set up. We both bid for the Russians but I won with the higher bid. However, as I had a German setup prepared and he had not, I agreed to play the Germans with a zero bid to speed up the setup.

While Armin set up his attack, I wandered around the room to have a look at other playings of WO12. What I found out is that no two games resembled each other with regard to the German defensive setup. This is either an indication that the best approach for the Germans has not yet been grokked or that the scenario has a high replay value.

My plan was to basically forfeit the village and build a castle behind the gully near the VC bridge with almost all fortifications which would form an intricately woven defence that would be very hard to crack from the East but could also engage the Russians that would eventually approach from the West. The Germans would delay the Russians entering from the East and the South for a while and then fall back to the 'castle' to make their stand in force.

Unfortunately, during the Russian approach phase, I just seemed incapable of inflicting any sort of damage despite ample opportunity. My opponent stepped into numerous bore sighted hexes. Among this was stack of 3 Russian squads plus SW and 9-1 leader that FFNAM'ed through the boresighted location of one of the German MMGs. He escaped with one squad broken and one squad pinned. In another player turn involving almost 40 squads of this monster, all damage the Germans were capable to inflict despite good shots and a 6 shot MTR ROF tear into woods were one pinned leader and one pinned squad. It was highly frustrating for the Germans in this phase of the game.

Eventually, the Russians moved up to the far end of the Gully of board 67 and began to realize the strength of the defensive position on the other side. Falling back with my Germans mainly worked as planned except for 1.5 sacrifical squad equivalents and two squads that rather fled somewhere deep into the woods of board 32 to reemerge later rather than getting overwhelmed by too many Russians immedately. Two other squads and a 9-1 were broken and in a good postion to rally. But throughout the entire game they could not make it. At first, they wasted good chances. Later, they were re-DM'ed by the advancing Russians time and again until the last of them finally succumbed in Turn 7.

However now, the Russians needed to move into the teeth of an intact German defence holed up in a network of trenches and bunkers with open ground and an open gully before them. To avoid some of the worst punishment, some Russians detoured which cost them some time. Others tried to move forward but were broken and thrown back. From behind, the Russian Turn 4 reinforcements and those from the South closed in, also repeatedly held up. Things were getting really vicious now.

The Russians realized that to get onto the bridge, their only real chance would be to swamp the German defences, which would be very bloody and costly. Now, it began to tell that the Germans were illfated when they could not delay the Russians earlier against the odds. There were Russian hordes at hand for the job. In a key attack, a low odds shot from the Russians managed to break the German 10-2, a 468+MMG, and to kill the crew of the 75 INF Gun all entrenched together ADJACENT to one of the two access hexes of the Bridge. The Germans managed to kill or immobilize all Russian tanks (though the German ATG had no part in it failing three or four shots before being overrun). One of them managed to drive onto the bridge before being killed.#

The 10-2, 468+MMG and INF Gun sorely missing, one Russian squad made it onto the Bridge in Russian Turn 6 which meant that the Germans would need to take it back vs. the hordes of surrounding Russians. In German Turn 6, the Germans wreaked some more havoc among the Russians reducing a portion of potential Russian Defensive Fire. IIRC the Bridge Location itself had also no Russian survivors at this point.

However, the Germans had to run the gauntlet against all odds: Out of a Trench into the Gully, out of the Gully and onto the Bridge. IIRC they made it up into the Brigde access hex before being broken. I lost, Russian win.

An incredibly tense and exciting game that left us completely exhausted as something like 2am in the morning. But it would not be Grenadier if there had not been some few other people up and boozing. I joined in to get down a little before sorting back my counters to clear the table for the next morning's match.


von Marwitz
 

von Marwitz

Forum Guru
Joined
Nov 25, 2010
Messages
14,387
Reaction score
10,291
Location
Kraut Corner
Country
llUkraine
J189 Buckley's Block vs. Lars-Peder Jensen

Saturday Morning – Main Tournament Round 3

J189 Buckley's Block Scenario Archive.jpg


Feeling that the alternative scenarios for this round were somewhat precarious for their balance (SP263 Snova Snare and ESG#21 Dying to Kill), we played J189 Buckley's Block with me defending as the Marines.

With Rain falling and Mud in effect, this scenario reflects some of the misery that soldiers fighting in PTO had to endure. A Japanese force of 12 squads, 7 of them Elite and well equipped with SW need to push 6 Marine squads out of the way that are supported by a 37mm ATG and an M3 GMC 75mm Gun-halftrack. CVP are gained either by killing Marines or exiting the board.

The problem for the Marines in this one is that they must not let the Japanese get close and personal because they cannot trade squads one on one with the attackers. As the terrain has a lot of Kunai between the Jungle, the Marines need to carefully consider their setup to inhibit the movement of the Japanese as much as possible.

My plan was to appear strongest on the southern side of board 37 to lure the Japanese to attacking into the teeth of my defence closer to the sea. Whether by my malicious subterfuge or his own volition, the Japanese schwerpunkt of the attack came where I wanted it.

The first two Japanese movement phases were mainly taken up with approach and some feeling out my defences. I was holding back most of my fire where possible, redeployed a bit in the south and kept the scouts at bay with a FL. I believe it was the Japanese Turn 3 when the fighting began in earnest. I had all MGs and 4 squads on my northern flank and was getting the lead out foiling most Japanese approach attempts. In the return fire, one of my Marine squads with MMG broke, though.

This is when things become difficult for the Marines: With only 6 squads, not all of which will be found on one flank, the breaking of any one of them will be sorely felt – especially if it carries one of the MGs. Falling back to a spot where they can find enough time to rally before the Japanese close in to re-DM them is not easy.

It became apparent, that the Japanese would attempt to break through in the North close to the river. Despite my left southern flank was significantly weaker and there were some Japanese lurking there, my M3 GMC Gun-ht and the ATG could hold them in check.

What some players may overlook but what makes a huge difference in this scenario -per US Multi Applicable Ordnance Note C:

„Printed canister Depletion numbers are increased by three for use in the PTO unless the superscript "P" is present to indicate that canister is available only in the PTO; e.g., "C7" becomes "C10" when used in the PTO, but "C7P" is used as "C7" and only in the PTO.“

Furthermore, Marines are an Elite formation upping Special Ammo by one. This means the ATG has a Canister depletion number of 11. Or in other words unlimited Canister unless the Gun breaks. [Edit: This is not correct. An 'auto-increase' for Special Ammo only applies to Elite formations that are SS or Russian Guards. Otherwise, an SSR is required or it would have to be a DYO scenacrio. See C8.2. Thus, the ATG has C10 in this scenario.]

With no TH roll required to potentially apply 12 FP into three hexes in one shot and the capability to keep ROF, this seemingly little 37mm AT-Gun is in reality a deadly killer in this scenario and might stop a Banzai charge cold.

My Marines fell back parallel to the Japanese to take up positions infesting the exit area with Fire Lane opportunities and at the same time threatening to do the same in the direction of the advancing Japanese behind the Marines.

I had also in mind, chancing Bog in the Mud conditions, to fall back with the Gun-ht and have it thrash into the Jungle to gain LOS over the exit area towards the river. Good to note: If its crew Abandons the halftrack, it can remove the AAMG as a dm .50 Cal heavy MG. Might require some time to get it out and assemble it, to pass it on to another unit and for the crew maybe even to re-occupy the ht, but it is worth to keep in mind.

Unfortunately, we were running short of time to get the scenario finished before the deadline. Though my position might have been a bit favorable with regard to the outcome, we decided to avoid having the scenario judged and rolled for it. The lower dr would win, a tie would result in a draw. The outcome was a Japanese win and a loss for me.

A good PTO scenario that we both found entertaining and exciting.


von Marwitz
 
Last edited:

von Marwitz

Forum Guru
Joined
Nov 25, 2010
Messages
14,387
Reaction score
10,291
Location
Kraut Corner
Country
llUkraine
WO2 Failure to Communicate vs. Peter Veenstra

Saturday Afternoon – Main Tournament Round 4

WO02 Failure to Communicate Scenario Archive.jpg


Peter wanted to play the Germans in this one, I preferred the French, so the stage was set quickly. The Germans attack with an infantry force which is reinforced by a strong force of tanks after a couple of turns. The objective of the Germans is to capture a number of multi-hex buildings. Most of them are located in a village on the near side of a stream (from German perspective) some others on the far side of it.

My plan for the French was to defend the near-side village in strength so as to force the Germans to commit their Schwerpunkt to attack it because they could not ignore it for the VC conditions. The hill plateau of board 59 would be swept by the French 10-2 directing the MMG and long range fire by another leader-directed French squad. This threat would make the Germans avoid moving across the hill but rather try to approach the village via the very southern flank. That area would bottle the Gemans up and make them lose time until their armor support arrived. The time lost in the early turns the Germans would miss in the end game to capture the last of the required buildings. In the center and on the northern flank, the French would position token forces to keep the Germans honest. These would either go down or fall back to the rearward victory buildings.

The plan worked out pretty well. As I had hoped, most Germans set up on the southern half of board 59 at ground level. The German 9-2 with a 468+dm HMG set up on the hill behind some woods. One stack of Germans set up in the southern part of board 42, apparently to attack through the center.

The southern Germans advanced through the grain to be struck by a FL of my LMG and a bit of infantry fire causing a bit of damage and pins. They tried to reach the patch of woods on the board-edge, which was covered by the French 60mm MTR and some infantry. The German 9-2 group was a bit audacious moving on the board 59 hill and was promptly killed and its accompanying squad broken and ELR'ed by the French MMG directed by the 10-2 in the first halfturn. This was of course a serious blow for the Germans. Subsequently, a further German HS carrying the 50mm MTR was also killed on the hill. In the attempt to do so, I used the French ATR, which promptly broke. Using it was a bad mistake, because I should not have exposed it before the advent of the German tanks and because it gave away which one of one of the three possible groups I selected to be included at setup in the French OoB: The one with 2x 248, the ATR and 12 Minefield factors. Luckily for me, this information glitch seemed to escape my opponent. In the center, my HS and a dummy danced around a bit to appear very much dummy-like, on the norther flank, my token force went unchallanged.

In German Turn 2, the Germans found out to their chagrin, that the woods and some grain on the southern edge of board 59 were infested with AP mines which restricted infantry movement to very unfavorable open terrain or forced a detour over the hill which was still covered by the French 10-2 and 458+MMG menace. One of the French AMR 33s was also present, posing as an obstacle impervious to small arms fire. The 60mm MTR opened up on the Germans in the Woods hoping for Air Burst hits but unfortunately missed. The German advance was firmly stalled on the southern flank. In the center, the German stack believed my units to be all dummies and crossed the road offering my HS a 2-2 fire-opportunity. Alas, I gacked that roll and the Germans all safely arrived in the stone building on the other side of the road. The French redeployed a bit and a Shocked AMR 35 in the south recovered to successfully pull back in non-platoon movement out of LOS of the German ATR further plugging the open road at the southern edge of board 59. The French northern flank began falling back to the rearward victory buildings.

German Turn 3 saw their infantry cheeringly welcome the badly needed armored reinforcements. He moved them quite agressively across the board 59 hill and through one of the AP-Minefields creating a TB and with it a way for a German squad to exit it without attack and a possibility for the bottled up Germans in the woods for a detour to avoid the open road. And we had one of those memorable deeds of our cardboard-warriors that make ASL such a great game and which I will relate here:

A German Pz38(t)A rushed forward across the board 59 hill and closed in to freeze a French AMR 33 and a French 457+LMG in a stone building. For the purpose, it even ESB'ed and immobilized. Bound by target selection limits, I turned the turret of my AMR 33 and kept ROF. The second shot of its CMG armament destroyed the Pz 38(t)A and the crew survived and bailed out onto the CAFP hazardously moving. With nothing else to do, my 457+LMG fired 18-1 at the crew, which it miraculously survived unscathed along with other fire from outside the hex. Other German units closed in from outside. Having survived the MPh, the Crew was now placed IN the Stone Building and the Location marked with CC. In the CCPh, combat being sequential, the German tank crew attacked my tank, rolled snakes to kill it and to generate a 8-1 leader. Talk about candidates for an Eisernes Kreuz here.

While the arrival of the German tanks significantly raised the pressure on the French, they were also getting into the sights of the yet HIP French ATG and the French were still firmly lodged in the village. No building had been captured by the Germans yet. Because my opponent was having a bad cold menacing him and feeling sick, he conceded at that point. It was just as well for me as the previous night had been a short one. So a French win for me.

Now, I should have gone to bed right now. But it would not be Grenadier, if the action would not continue „offboard“. A hard core of Grenadiers sat together long into the small hours of the night having lots of fun talking together and boozing. Sleep is overestimated after all...


von Marwitz
 

von Marwitz

Forum Guru
Joined
Nov 25, 2010
Messages
14,387
Reaction score
10,291
Location
Kraut Corner
Country
llUkraine
ESG#107 Put Out the Searchlights vs. John Tait

Sunday Morning – Main Tournament Round 5

ESG107 Put Out the Searchlights Scenario Archive.jpg


John Tait is a very nice guy, so I was happy to play the last round of the tournament with him. He is also often among those that stay up the longest. So both of us might have had between 3.5 to 4 hours of sleep before setting ourselves to the gaming table again.

We selected ESG#107 'Put Out the Searchlights' with John playing the attacking Germans and me the defending British. Objective for the Germans is to accumulate more VP than the British which can be done by the capture of buildings and the sole bridge. The British have the option to forfeit one or two of their tank reinforcements and receiving 3VP in turn for each. The Germans have to watch out for not exceeding a CVP cap that would roughly correspond to three AFV and some infantry.

The German AFV are thin skinned PzIIA's and two SPW 251/1's, a PzIIF and a PzIVD entering in turn 4. The British tanks are two A13 Mk 1's. The German infantry is 2/3 of 1st line and 1/3 of Elite quality. The British have only 2nd Line infantry but are equipped with 3x ATR and 3x LMG that can be a danger to the thin skinned German AFV.

My plan was to look strong on the British right to lure the German into attacking through the right. The British right offers a more covered approach, however I had sealed off the only opening in the south of the wall surrounding the area with a roadblock thus closing that way for the ht's. If the German would select this way of attack, my hope was that he would be losing time because it would entail attacking through the entire village on the far side of the canal. My British would put up a fighting withdrawal to hole up in the two largest multi-hex buildings that would be not easy to clear out quickly and to hold the bridge.

The Germans did opt for the attack vs. the British left flank as I had hoped. Thus the fighting withdrawal begun. It worked out quite well and I managed to move in a way that allowed my units to avoid most of the German FP in the British turns while threatening hexes the Germans would have to move through during their turns. Determining that my infantry alone would be in too tight a spot without armor support, I brought on both A13 Mk I's with the intention to inhibit the movement of the German AFVs and to take advantage of the 6FP CMGs vs. German infantry while being invulnerable to small arms.

During the battle I was able to inflict more losses on the Germans than I took, so the CVP cap of the Germans was getting into reach while at the same time he would need to take more risks to close in to capture enough buildings. Managing that without exceeding his CVP cap seemed extremely unlikely, so the Germans conceded. British victory and my win.


von Marwitz
 

M.Koch

Grenadier TD
Joined
Sep 4, 2004
Messages
2,556
Reaction score
991
Location
Germany
Country
llGermany
Thanks for the excellent AAR, Herr Oberst.
Talking about boozing after the games...I´m still looking for the man-portable black-hole counter...Think i destroyed Mr. Koestlers dreams of an easy Allied victory with this secret V-weapon of the Wehrmacht...Muahahahahaha :rofl:
 

Koestler

Member
Joined
Jan 11, 2010
Messages
118
Reaction score
60
Location
Amsterdam
Country
llNetherlands
Think i destroyed Mr. Koestlers dreams of an easy Allied victory with this secret V-weapon of the Wehrmacht...
I think that was the plan to let every German squad have an inherent Goliath, which is flamethrower equipped, but the details are a bit hazy.
 

Jacometti

Elder Member
Joined
Nov 3, 2008
Messages
3,913
Reaction score
1,898
Location
Halifax, NS
Country
llCanada
"Marines are an Elite formation upping Special Ammo by one." (Buckley's Block)

I do not believe this is correct. After reading C8.2 (Elite) rules, only SS and Russian GUARDS units transfer their elite status automatically to their guns and AFVs. For guns or tanks used by the USMC, I believe this should still be specified in an SSR.

Can anyone correct me if I am wrong ?
 
Last edited:

von Marwitz

Forum Guru
Joined
Nov 25, 2010
Messages
14,387
Reaction score
10,291
Location
Kraut Corner
Country
llUkraine
I believe you are right unless it would by DYO with the majority squad type being Elite.
The majority squad type is Elite here, but J189 is not DYO.

One could argue that the intention of C8.2 in this context might have been to grant a Special Ammo Depletion number increase under such circumstances. However, it is indeed doubtful as it could have easily been spelled out but is not.

So Canister 10 for the ATG. Which is still vicious enough...

von Marwitz
 

wrongway149

Forum Guru
Joined
Aug 25, 2005
Messages
9,411
Reaction score
2,125
Location
Willoughby, Ohio
Country
llUnited States
WO12 Heart of Wilderness vs. Armin Deppe

Friday Afternoon – Main Tournament Round 2

View attachment 3348


Despite Armin also being a veteran of Grenadier Tournament, we had never played each other before except yesterday in the Mini-Tournament. Now he would have his chance for a revenge.

My first choice for this round was CH6 Armored Probe, his was FrF67 Collechio, so we ended up with WO12 Heart of Wilderness. This is not to say this is a bad scenario – on the contrary – it turned out to be my favorite scenario of the event. Not being among the fast players, I was concerned that it would take a ton of time as it includes 16 German and 30 Russian squads and a lot of fortifications to set up. We both bid for the Russians but I won with the higher bid. However, as I had a German setup prepared and he had not, I agreed to play the Germans with a zero bid to speed up the setup.

While Armin set up his attack, I wandered around the room to have a look at other playings of WO12. What I found out is that no two games resembled each other with regard to the German defensive setup. This is either an indication that the best approach for the Germans has not yet been grokked or that the scenario has a high replay value.

My plan was to basically forfeit the village and build a castle behind the gully near the VC bridge with almost all fortifications which would form an intricately woven defence that would be very hard to crack from the East but could also engage the Russians that would eventually approach from the West. The Germans would delay the Russians entering from the East and the South for a while and then fall back to the 'castle' to make their stand in force.

Unfortunately, during the Russian approach phase, I just seemed incapable of inflicting any sort of damage despite ample opportunity. My opponent stepped into numerous bore sighted hexes. Among this was stack of 3 Russian squads plus SW and 9-1 leader that FFNAM'ed through the boresighted location of one of the German MMGs. He escaped with one squad broken and one squad pinned. In another player turn involving almost 40 squads of this monster, all damage the Germans were capable to inflict despite good shots and a 6 shot MTR ROF tear into woods were one pinned leader and one pinned squad. It was highly frustrating for the Germans in this phase of the game.

Eventually, the Russians moved up to the far end of the Gully of board 67 and began to realize the strength of the defensive position on the other side. Falling back with my Germans mainly worked as planned except for 1.5 sacrifical squad equivalents and two squads that rather fled somewhere deep into the woods of board 32 to reemerge later rather than getting overwhelmed by too many Russians immedately. Two other squads and a 9-1 were broken and in a good postion to rally. But throughout the entire game they could not make it. At first, they wasted good chances. Later, they were re-DM'ed by the advancing Russians time and again until the last of them finally succumbed in Turn 7.

However now, the Russians needed to move into the teeth of an intact German defence holed up in a network of trenches and bunkers with open ground and an open gully before them. To avoid some of the worst punishment, some Russians detoured which cost them some time. Others tried to move forward but were broken and thrown back. From behind, the Russian Turn 4 reinforcements and those from the South closed in, also repeatedly held up. Things were getting really vicious now.

The Russians realized that to get onto the bridge, their only real chance would be to swamp the German defences, which would be very bloody and costly. Now, it began to tell that the Germans were illfated when they could not delay the Russians earlier against the odds. There were Russian hordes at hand for the job. In a key attack, a low odds shot from the Russians managed to break the German 10-2, a 468+MMG, and to kill the crew of the 75 INF Gun all entrenched together ADJACENT to one of the two access hexes of the Bridge. The Germans managed to kill or immobilize all Russian tanks (though the German ATG had no part in it failing three or four shots before being overrun). One of them managed to drive onto the bridge before being killed.#

The 10-2, 468+MMG and INF Gun sorely missing, one Russian squad made it onto the Bridge in Russian Turn 6 which meant that the Germans would need to take it back vs. the hordes of surrounding Russians. In German Turn 6, the Germans wreaked some more havoc among the Russians reducing a portion of potential Russian Defensive Fire. IIRC the Bridge Location itself had also no Russian survivors at this point.

However, the Germans had to run the gauntlet against all odds: Out of a Trench into the Gully, out of the Gully and onto the Bridge. IIRC they made it up into the Brigde access hex before being broken. I lost, Russian win.

An incredibly tense and exciting game that left us completely exhausted as something like 2am in the morning. But it would not be Grenadier if there had not been some few other people up and boozing. I joined in to get down a little before sorting back my counters to clear the table for the next morning's match.


von Marwitz
Great AAR - glad you enjoyed the scenario. I've considered this one to be a larger version of 'Schloss Hemingstein'--The combination of fall back and static defense against an attacking force that-- on paper--should overwhelm it seems to work well in both cases. I will use that paradigm again if opportunity arises.
 
Last edited:

Mister T

Elder Member
Joined
Aug 12, 2006
Messages
4,204
Reaction score
1,683
Location
Bruxelles
Country
llFrance
Great AAR - glad you enjoyed the scenario. I've considered this one to be a larger version of 'Schloss Hemingstein'--The combination of fall back and static defense against an attacking force that-- on paper--should overwhelm it seems to work well in both cases. I will use that paradigm again if opportunity arises.
A feature of the scenario is also the very wide front along which the attacker can attack. Makes the defender setup hard but it's rewarding when you find one acceptable.
 

von Marwitz

Forum Guru
Joined
Nov 25, 2010
Messages
14,387
Reaction score
10,291
Location
Kraut Corner
Country
llUkraine
Great AAR - glad you enjoyed the scenario. I've considered this one to be a larger version of 'Schloss Hemingstein'--The combination of fall back and static defense against an attacking force that-- on paper--should overwhelm it seems to work well in both cases. I will use that paradigm again if opportunity arises.
I like 'building castles', so this one was for me. In fact, I liked Schloss Hemingstein a lot, too. Have played it twice.

von Marwitz
 
Top