Mike205
Senior Member
- Joined
- Jul 7, 2017
- Messages
- 150
- Reaction score
- 301
- Country
-

Our second foray into the Friendly Fire series featured another heater. In this late war scenario, the Soviets have established a bridgehead over the Oder River at the town of Neu Glietzen, roughly sixty kilometers (that’s 37.2823 miles for my fellow Americans) northeast of Big Bad Berlin.
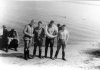
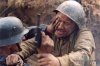
The Soviet 8th penal battalion spearheaded the river crossing. By 1945 there were no shortage of Shtrafbat- newly liberated POWs were routinely grouped into these units alongside “defeatists” who had retreated in battle and common criminals released from the Gulags. These units were often given dangerous missions, like clearing minefields or capturing heavily defended fortifications with the hope that few of the inmates would return. Those that did would have wanted to prove that they’d committed a heroic act so that they could be released from the unit. Others were released after suffering combat injuries.
Many historians have written about Stalin’s merciless and desperate response to the defeats in 1941-1942, and even popular culture, such as the Call of Duty and Company of Heroes series, and the film Enemy at the Gates has covered this period pretty well. Yet the wave of repression that accompanied the Red Army’s return to Belarus, the Ukraine, the Baltics, and Poland has received less coverage. I can’t imagine somehow surviving Nazi occupation and then being herded into one of these units. When I was in graduate school I worked alongside a guy from the Ukraine whose grandfather had fought in the Red Army in 1941, been captured that first summer, somehow survived the first harsh winter in deplorable living conditions and then been (fortunately) deported to work in Germany. In 1945 he was repatriated to the Soviet Union and spent another five years in the Gulags. Sadly, his grandson has now fled the current fighting around his hometown of Donetsk and is working in the States.
There are actually a few memoirs written by survivors of the Shtrafbat that have been translated into English- Aleksandr Pyl’cyn’s Penalty Strike: The Memoirs of A Red Army Penal Company Commander, 1943-45 is a good place to start if you’re interested in learning more about these units.
The Soviet TV mini- series Shtrafbat is also available on Youtube:
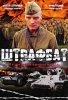
Produced in 2004 it provides some pretty fair assessments of the Soviet past and is itself now an artifact that evidences the narrow window of time between the end of the Soviet Union and the establishment of a new, authoritarian Russian Federation.
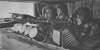
In this scenario, the first assault wave has established a bridgehead, and the second wave is preparing to cross the river. True to form, their NKVD handlers have not provided them with boats, and the inmates must swim or cross on a few rudimentary rafts designed to transport their SW. Imagine not being able to swim and given that order by some guys backed up my Maxim machine guns…
This second wave consists of 6x5-2-7s, 2x4-4-7s, a lmg, 2 mmgs, and an atr, led by a 9-0 commissar. These troops also get two small raft counters and two 1 squad foxholes.
The commissars would play a central role in the late turn carnage which ensued.
The first wave is comprised of 11x5-2-7s, a lmg, dc, and another 9-0 commissar. By SSR, the Soviet player picks a beachhead location on the west side of the river after German setup. This beachhead consists of five contiguous hexes next to shore hexes. For each German CVP and fortification removed by the perimeter, the Soviet player must remove an equivalent squad from its OB.
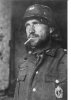
Facing the Reds are the weary remnants of 5th Jaeger Division.
A battle tested pre-war formation drawn from southwest Germany, they are represented by a 5-4-8, 6x4-6-7s, a 2-4-7, 1 mmg, lmg, and a 37L AA gun led by 2x 8-0 leaders, with four dummies and trench counters for supporting fortifications. On turn three they’re bolstered by 2x5-4-8s, 3x4-6-7s, a lmg, a 7-0, and a 9-1 leader, as well as a stray Jagdpanzer from Panzer-jaeger Kompanie 1005.
VC call for the Germans to ensure that the Soviets control 5 or less buildings west of the river or have only three or fewer unbroken squads west of the river by the end of the 7 turn game.
The EC were Wet, no wind, the river was flooded with a slow northward current and by SSR the Soviets were given PF usage as if they were Hungarians. The Jagdpanzer was also provided with undepleteable HE.
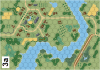
We diced up and I drew the defending Jaegers. Of course the main challenge was trying to cover all the possible landing sites. To that end I set up the 37 AA HIP in C4 with CA C5/D5 to cover a southern crossing. A 4-6-7 went in the F5 woods, another in the I6 farmhouse. I set up a 8-0 rally point in L5 and another in M8. I set some dummies up in the H8 cemetery and another 4-6-7 in K6. My 2-4-7 went into the K9 building as my gesture towards possible slowing down a landing in the middle. However, if it came down to that kind of scenario playing out I planned to rely on my turn 3 reinforcements and a scrambling pinchers counter attack from the east and south to contain it.
I deployed my 5-4-8 so that they could crew the lmg and mmg. The mmg and a trench went into G12 to cover the bend, a dummy and trench went into H11 in case the mmg crew started taking excessive heat. I placed a reserve 4-6-7 and a trench in I12. Another 4-6-7 went into the L12 farmhouse, and I placed an additional one In N11. The final 4-6-7 went into the N14 woods, and my lmg crew and a trench covered the northeast portion of the river in the I16 woods.
I wasn’t quite sure what to expect in terms of where the bridgehead and crossings would be and I was hoping against hope that I could scrape together enough of my OB and concentrate them, buying time for my reinforcements to come on. I did expect the game to devolve into a swirling melee in the village center and honestly, I was hungry for it.
I think Doug was too, because he planted his hammer and sickle flag and accompanying bridgehead in the middle of the board- G6-H9, the fastest route to the village center. My only casualties were the dummy stack in H8, so he established his toehold with a full force.
After dicing for wind and engaging in some ineffectual mmg fire with my concealed mmg crew, Doug’s swimmers were off.
He placed two squads with mmgs and foxholes in C11 &C12, and rafts with squads and SW beached in E8 & E9 to reinforce the beachhead. Everyone else crowded into C13-E16 hexes. Splish-splash. All of Doug’s squads, minus one, entered the water. His guys in the beachhead spread out to the southwest, snatching some buildings along the outskirts of town.
I admit, when I drew the Germans I immediately imagined that 37mm AA gun wreaking havoc on a horde of defenseless troops swimming across the Oder- great gouts of water being cast up everywhere, the screams of drowning Soviets echoing across the waters as nervous Landser chainsmoked on the opposite shore.
In reality, the AA gun was completely ineffective. It managed to hit one of the rafts but the crew passed a 1MC and kept paddling. With no rate of fire, its performance was underwhelming. The mmg changed CA and raked the other raft, but the crew also passed their NMC. The 4-6-7 in F5 also took a shot at the G5 Soviets, but to no effect. That was the extent of my DfPh. Soviet AfPh, the G5 squad broke the neighboring fascists. Looking at the board, I had work to do. Doug’s Reds were encroaching on the town and already in a good position to potentially block my turn 3 reinforcements from coming in from the west. Still, if I could pull a few units away from the east I just might be able to prevent them from seizing the town center, and this looked quite possible.
Top of my turn 2, the AA went to work on the lmg toting squad in the closest raft. It MA’ed on the first shot and X’ed the next RfPh. Nice.
My mmg crew KIA’ed the rafters hauling the atr across the river but generated a sniper which killed one of my 8-0 leaders. Ouch! I took some potshots at the Soviets in J9 to no effect then started moving guys. The lmg crew popped out of its trench and into the adjacent woods to get LOS on the swimmers trying to cross the river. The rest of my eastern garrison started moving towards town to set up a new line of defense. For their part, Soviet return fire this turn was ineffective and mostly directed at my trench network in the G12 woods, trying, to no avail, to silence the mmg.
German turn 2 continued largely along the same lines- a lot of shot trading between units, especially the two soviet mmgs and my mmg crew on the point. Despite having a squad DM, I felt I’d done a good job of hustling back a few units and getting them into defendable positions. By the top of turn 3, Doug had taken most of the western part of the village, and had set up a line I4-J4-K4 to resist an anticipated entry of German reinforcements. However, a couple of well-placed 4-6-7s had managed to halt his right thrust, successfully stopping them from seizing the M9 intersection. The real drama came in the form of a prolonged melee between two 5-2-7s and a 4-6-7 in L5, which the Soviets ultimately won but at the cost of a squad. Looking things over, it appeared that I needed to focus my energies on keeping the Reds on the south side of the M9 intersection so that my reinforcements could deal with the troops on the west side of the village and exploit the gap in their lines.
Things went better than expected. My Jagdpanzer rolled into I1 and took a bounding fire shot to gain acq on the squad holed up in I4. I rolled original 2s, resulting in a critical hit that dropped the house and buried the troops inside. Emboldened, I pushed my rallied 4-6-7 and errant AA gun crew in the south towards the rubble and set up a series of fire groups to start pinning down the troops further up the road. Another 4-6-7 slid into N6, in order to lay claim to the center of the village and start splitting the Soviet line.
Further east an active Soviet sniper pinned a squad and after being mercilessly raked with lmg fire, Doug’s reinforcements who landed in turn 2 continued their slog towards my strongpoint.
Turn 4 I’d worked a squad and crew up to the southern edge of the Soviet perimeter. A 4-6-7 successfully took down a 5-2-7 after another round of hand to hand fighting in L5 and a local Soviet counterattack in the south ended with a broken squad when they tried to take on my 2-2-8 gun crew.
A few turns prior they’d ruined their gun but more than made up for it, holding off a 5-2-7 with nothing more than their side arms and a scrounged MP-40. Iron Crosses all around for these boys. The only downside for the Germans this turn was a rallied squad that went berserk and got hit with a 20 FP point blank shot, with predictable results.
I was slowly getting the upper hand in the center of the map, even though it looked like I might soon lose my strongpoint in the G12 woods.
Next turn however, my assault in the west stalled. Despite a good ROF the Jagdpanzer failed to dislodge a stubborn squad of Shtrafniki in J4 who wound up DMing a squad and pinning my crew of heroes. My 9-1 kill stack crossed the street and slipped into M6 boxing in another soviet squad who’d pinned in the M7 orchard while trying to advance into CC with my squad in M8 the prior turn. They quickly died and I was in position to start squeezing the remaining squads in J4 and L7, the rest of Doug’s troops were now east or south of the J5-M8 road network.
As expected, my G12 strongpoint fell at the start of turn 5. An active Soviet sniper pinned my 4-6-7 in I12 and broke my mmg crew, who died when they failed to route. Additional prep fire from a Soviet halfsquad later broke my pinned squad, which also died due to failure to route when it was outflanked. The boys from 8th Penal Battalion were mopping up.
Speaking of mopping up, in Turn 6 I cleared the western edge of the village and concentrated my troops for a final push on the eastern edge. At this point Doug had four buildings in his possession and needed to snatch two more to meet VC requirements. As the situation worsened, his commissars became more radical.
The Tokarevs came out, and in the last two turns of the game, these two managed to kill two and a half squads of their own men. Hardly helpful as Doug set up to scramble for a last gasp victory.
Start of turn 6 he jettisoned a healthy prep phase and threw not one, not two, but three squads against my 4-6-7 in L12.
The veteran Jaeger held their fire and KIA’ed the first squad in pointblank fire in K13. Another squad broke in final defensive fire in K12, and the third squad broke in L11 during a spectacular show of stones by the 4-6-7, which passed a subsequent final fire MC. It was pretty much game over at that point. Doug’s main force now lay tattered on the outskirts of Neu Glietzen and after being forced out of yet another building by fire from my tank destroyer, his survivors huddled in I8, K9, and L9 fearing their leaders just as much as the approaching enemy. Fifth Jaeger Division had held the line and contained, for now, the Soviet bridgehead across the Oder.
Looking back on this scenario, three crucial factors contributed to Soviet defeat. The first was Doug’s plan to extend the bridgehead by landing more troops east of H10 to create one contiguous line that bumped right up against my trench network. It would have been better to stretch my defense by landing farther east. True, the terrain and route to the village weren’t as favorable but an eastern landing would have pinned down the units I’d committed in that sector. Instead, I was able to shift them westwards in the first turn. This was the second crucial factor- I was able to get enough troops back into the village to prevent its complete capture and I was able to set them up largely in the terrain of my choosing- stone buildings. True, I wasn’t able to defend the entire village but my reinforcements dealt with the Soviet western line quite well, even better than expected at some moments, and I’d say that the Jagdpanzer’s critical hit greatly sped up the process of turning the flank and breaking his units down. Equally important, I did an unusually good job of keeping my cool, passing PMCs and keeping my guys organized into effective groupings that pushed the Soviets out in a very deliberate way.
Lastly, and most importantly, was the wild charge on Turn 6. I understood the rationale behind it but I think the unguarded N11 farmhouse should have been included as a target hex. It would have provided Doug with a better set of options- push west to M9 in turn 7 or place suppressive fire on L12 and launch a final assault for the win.
These points aside, I think it’s worth mentioning the damage done by the commissars. At game’s end the casualty ratio was 2:1 in favor of the Germans. Fifth Jaeger had lost 55 men and two leaders, whereas, 8th Penal Battalion suffered a crippling 105 casualties. About a quarter of them were caused by their own leaders, whose penchant for arbitrary violence undercut Doug’s force strength at a critical phase of the game.
This was another fun scenario by Friendly Fire that, due to the defensive challenges, beachhead placement, and landings, offers up a high level of replayability. I also really enjoyed the fact that it shed light on the Shtrafniki and their role in helping defeat Nazi Germany. Highly recommended.
The Soviet 8th penal battalion spearheaded the river crossing. By 1945 there were no shortage of Shtrafbat- newly liberated POWs were routinely grouped into these units alongside “defeatists” who had retreated in battle and common criminals released from the Gulags. These units were often given dangerous missions, like clearing minefields or capturing heavily defended fortifications with the hope that few of the inmates would return. Those that did would have wanted to prove that they’d committed a heroic act so that they could be released from the unit. Others were released after suffering combat injuries.
Many historians have written about Stalin’s merciless and desperate response to the defeats in 1941-1942, and even popular culture, such as the Call of Duty and Company of Heroes series, and the film Enemy at the Gates has covered this period pretty well. Yet the wave of repression that accompanied the Red Army’s return to Belarus, the Ukraine, the Baltics, and Poland has received less coverage. I can’t imagine somehow surviving Nazi occupation and then being herded into one of these units. When I was in graduate school I worked alongside a guy from the Ukraine whose grandfather had fought in the Red Army in 1941, been captured that first summer, somehow survived the first harsh winter in deplorable living conditions and then been (fortunately) deported to work in Germany. In 1945 he was repatriated to the Soviet Union and spent another five years in the Gulags. Sadly, his grandson has now fled the current fighting around his hometown of Donetsk and is working in the States.
There are actually a few memoirs written by survivors of the Shtrafbat that have been translated into English- Aleksandr Pyl’cyn’s Penalty Strike: The Memoirs of A Red Army Penal Company Commander, 1943-45 is a good place to start if you’re interested in learning more about these units.
The Soviet TV mini- series Shtrafbat is also available on Youtube:
Produced in 2004 it provides some pretty fair assessments of the Soviet past and is itself now an artifact that evidences the narrow window of time between the end of the Soviet Union and the establishment of a new, authoritarian Russian Federation.
In this scenario, the first assault wave has established a bridgehead, and the second wave is preparing to cross the river. True to form, their NKVD handlers have not provided them with boats, and the inmates must swim or cross on a few rudimentary rafts designed to transport their SW. Imagine not being able to swim and given that order by some guys backed up my Maxim machine guns…
This second wave consists of 6x5-2-7s, 2x4-4-7s, a lmg, 2 mmgs, and an atr, led by a 9-0 commissar. These troops also get two small raft counters and two 1 squad foxholes.
The commissars would play a central role in the late turn carnage which ensued.
The first wave is comprised of 11x5-2-7s, a lmg, dc, and another 9-0 commissar. By SSR, the Soviet player picks a beachhead location on the west side of the river after German setup. This beachhead consists of five contiguous hexes next to shore hexes. For each German CVP and fortification removed by the perimeter, the Soviet player must remove an equivalent squad from its OB.
Facing the Reds are the weary remnants of 5th Jaeger Division.
A battle tested pre-war formation drawn from southwest Germany, they are represented by a 5-4-8, 6x4-6-7s, a 2-4-7, 1 mmg, lmg, and a 37L AA gun led by 2x 8-0 leaders, with four dummies and trench counters for supporting fortifications. On turn three they’re bolstered by 2x5-4-8s, 3x4-6-7s, a lmg, a 7-0, and a 9-1 leader, as well as a stray Jagdpanzer from Panzer-jaeger Kompanie 1005.
VC call for the Germans to ensure that the Soviets control 5 or less buildings west of the river or have only three or fewer unbroken squads west of the river by the end of the 7 turn game.
The EC were Wet, no wind, the river was flooded with a slow northward current and by SSR the Soviets were given PF usage as if they were Hungarians. The Jagdpanzer was also provided with undepleteable HE.
We diced up and I drew the defending Jaegers. Of course the main challenge was trying to cover all the possible landing sites. To that end I set up the 37 AA HIP in C4 with CA C5/D5 to cover a southern crossing. A 4-6-7 went in the F5 woods, another in the I6 farmhouse. I set up a 8-0 rally point in L5 and another in M8. I set some dummies up in the H8 cemetery and another 4-6-7 in K6. My 2-4-7 went into the K9 building as my gesture towards possible slowing down a landing in the middle. However, if it came down to that kind of scenario playing out I planned to rely on my turn 3 reinforcements and a scrambling pinchers counter attack from the east and south to contain it.
I deployed my 5-4-8 so that they could crew the lmg and mmg. The mmg and a trench went into G12 to cover the bend, a dummy and trench went into H11 in case the mmg crew started taking excessive heat. I placed a reserve 4-6-7 and a trench in I12. Another 4-6-7 went into the L12 farmhouse, and I placed an additional one In N11. The final 4-6-7 went into the N14 woods, and my lmg crew and a trench covered the northeast portion of the river in the I16 woods.
I wasn’t quite sure what to expect in terms of where the bridgehead and crossings would be and I was hoping against hope that I could scrape together enough of my OB and concentrate them, buying time for my reinforcements to come on. I did expect the game to devolve into a swirling melee in the village center and honestly, I was hungry for it.
I think Doug was too, because he planted his hammer and sickle flag and accompanying bridgehead in the middle of the board- G6-H9, the fastest route to the village center. My only casualties were the dummy stack in H8, so he established his toehold with a full force.
After dicing for wind and engaging in some ineffectual mmg fire with my concealed mmg crew, Doug’s swimmers were off.
He placed two squads with mmgs and foxholes in C11 &C12, and rafts with squads and SW beached in E8 & E9 to reinforce the beachhead. Everyone else crowded into C13-E16 hexes. Splish-splash. All of Doug’s squads, minus one, entered the water. His guys in the beachhead spread out to the southwest, snatching some buildings along the outskirts of town.
I admit, when I drew the Germans I immediately imagined that 37mm AA gun wreaking havoc on a horde of defenseless troops swimming across the Oder- great gouts of water being cast up everywhere, the screams of drowning Soviets echoing across the waters as nervous Landser chainsmoked on the opposite shore.
In reality, the AA gun was completely ineffective. It managed to hit one of the rafts but the crew passed a 1MC and kept paddling. With no rate of fire, its performance was underwhelming. The mmg changed CA and raked the other raft, but the crew also passed their NMC. The 4-6-7 in F5 also took a shot at the G5 Soviets, but to no effect. That was the extent of my DfPh. Soviet AfPh, the G5 squad broke the neighboring fascists. Looking at the board, I had work to do. Doug’s Reds were encroaching on the town and already in a good position to potentially block my turn 3 reinforcements from coming in from the west. Still, if I could pull a few units away from the east I just might be able to prevent them from seizing the town center, and this looked quite possible.
Top of my turn 2, the AA went to work on the lmg toting squad in the closest raft. It MA’ed on the first shot and X’ed the next RfPh. Nice.
My mmg crew KIA’ed the rafters hauling the atr across the river but generated a sniper which killed one of my 8-0 leaders. Ouch! I took some potshots at the Soviets in J9 to no effect then started moving guys. The lmg crew popped out of its trench and into the adjacent woods to get LOS on the swimmers trying to cross the river. The rest of my eastern garrison started moving towards town to set up a new line of defense. For their part, Soviet return fire this turn was ineffective and mostly directed at my trench network in the G12 woods, trying, to no avail, to silence the mmg.
German turn 2 continued largely along the same lines- a lot of shot trading between units, especially the two soviet mmgs and my mmg crew on the point. Despite having a squad DM, I felt I’d done a good job of hustling back a few units and getting them into defendable positions. By the top of turn 3, Doug had taken most of the western part of the village, and had set up a line I4-J4-K4 to resist an anticipated entry of German reinforcements. However, a couple of well-placed 4-6-7s had managed to halt his right thrust, successfully stopping them from seizing the M9 intersection. The real drama came in the form of a prolonged melee between two 5-2-7s and a 4-6-7 in L5, which the Soviets ultimately won but at the cost of a squad. Looking things over, it appeared that I needed to focus my energies on keeping the Reds on the south side of the M9 intersection so that my reinforcements could deal with the troops on the west side of the village and exploit the gap in their lines.
Things went better than expected. My Jagdpanzer rolled into I1 and took a bounding fire shot to gain acq on the squad holed up in I4. I rolled original 2s, resulting in a critical hit that dropped the house and buried the troops inside. Emboldened, I pushed my rallied 4-6-7 and errant AA gun crew in the south towards the rubble and set up a series of fire groups to start pinning down the troops further up the road. Another 4-6-7 slid into N6, in order to lay claim to the center of the village and start splitting the Soviet line.
Further east an active Soviet sniper pinned a squad and after being mercilessly raked with lmg fire, Doug’s reinforcements who landed in turn 2 continued their slog towards my strongpoint.
Turn 4 I’d worked a squad and crew up to the southern edge of the Soviet perimeter. A 4-6-7 successfully took down a 5-2-7 after another round of hand to hand fighting in L5 and a local Soviet counterattack in the south ended with a broken squad when they tried to take on my 2-2-8 gun crew.
A few turns prior they’d ruined their gun but more than made up for it, holding off a 5-2-7 with nothing more than their side arms and a scrounged MP-40. Iron Crosses all around for these boys. The only downside for the Germans this turn was a rallied squad that went berserk and got hit with a 20 FP point blank shot, with predictable results.
I was slowly getting the upper hand in the center of the map, even though it looked like I might soon lose my strongpoint in the G12 woods.
Next turn however, my assault in the west stalled. Despite a good ROF the Jagdpanzer failed to dislodge a stubborn squad of Shtrafniki in J4 who wound up DMing a squad and pinning my crew of heroes. My 9-1 kill stack crossed the street and slipped into M6 boxing in another soviet squad who’d pinned in the M7 orchard while trying to advance into CC with my squad in M8 the prior turn. They quickly died and I was in position to start squeezing the remaining squads in J4 and L7, the rest of Doug’s troops were now east or south of the J5-M8 road network.
As expected, my G12 strongpoint fell at the start of turn 5. An active Soviet sniper pinned my 4-6-7 in I12 and broke my mmg crew, who died when they failed to route. Additional prep fire from a Soviet halfsquad later broke my pinned squad, which also died due to failure to route when it was outflanked. The boys from 8th Penal Battalion were mopping up.
Speaking of mopping up, in Turn 6 I cleared the western edge of the village and concentrated my troops for a final push on the eastern edge. At this point Doug had four buildings in his possession and needed to snatch two more to meet VC requirements. As the situation worsened, his commissars became more radical.
The Tokarevs came out, and in the last two turns of the game, these two managed to kill two and a half squads of their own men. Hardly helpful as Doug set up to scramble for a last gasp victory.
Start of turn 6 he jettisoned a healthy prep phase and threw not one, not two, but three squads against my 4-6-7 in L12.
The veteran Jaeger held their fire and KIA’ed the first squad in pointblank fire in K13. Another squad broke in final defensive fire in K12, and the third squad broke in L11 during a spectacular show of stones by the 4-6-7, which passed a subsequent final fire MC. It was pretty much game over at that point. Doug’s main force now lay tattered on the outskirts of Neu Glietzen and after being forced out of yet another building by fire from my tank destroyer, his survivors huddled in I8, K9, and L9 fearing their leaders just as much as the approaching enemy. Fifth Jaeger Division had held the line and contained, for now, the Soviet bridgehead across the Oder.
Looking back on this scenario, three crucial factors contributed to Soviet defeat. The first was Doug’s plan to extend the bridgehead by landing more troops east of H10 to create one contiguous line that bumped right up against my trench network. It would have been better to stretch my defense by landing farther east. True, the terrain and route to the village weren’t as favorable but an eastern landing would have pinned down the units I’d committed in that sector. Instead, I was able to shift them westwards in the first turn. This was the second crucial factor- I was able to get enough troops back into the village to prevent its complete capture and I was able to set them up largely in the terrain of my choosing- stone buildings. True, I wasn’t able to defend the entire village but my reinforcements dealt with the Soviet western line quite well, even better than expected at some moments, and I’d say that the Jagdpanzer’s critical hit greatly sped up the process of turning the flank and breaking his units down. Equally important, I did an unusually good job of keeping my cool, passing PMCs and keeping my guys organized into effective groupings that pushed the Soviets out in a very deliberate way.
Lastly, and most importantly, was the wild charge on Turn 6. I understood the rationale behind it but I think the unguarded N11 farmhouse should have been included as a target hex. It would have provided Doug with a better set of options- push west to M9 in turn 7 or place suppressive fire on L12 and launch a final assault for the win.
These points aside, I think it’s worth mentioning the damage done by the commissars. At game’s end the casualty ratio was 2:1 in favor of the Germans. Fifth Jaeger had lost 55 men and two leaders, whereas, 8th Penal Battalion suffered a crippling 105 casualties. About a quarter of them were caused by their own leaders, whose penchant for arbitrary violence undercut Doug’s force strength at a critical phase of the game.
This was another fun scenario by Friendly Fire that, due to the defensive challenges, beachhead placement, and landings, offers up a high level of replayability. I also really enjoyed the fact that it shed light on the Shtrafniki and their role in helping defeat Nazi Germany. Highly recommended.