@Matt Boehland and I got a head start on D-Day commemorations yesterday afternoon by putting Pegasus Bridge on the table. Given the subject matter and a desire to get better with Chapter E, there was absolutely no way we couldn't play
PB1 Ham and Bloody Jam. For our second scenario, we chose
PB3 Piecemeal.
In both cases, I played the British, and Matt played as the Germans.
The results of these playings should be taken with a certain grain of salt, as there was a fair amount of rules overhead (E1., E2., E8., Q, PB SSRs) and I didn't have nearly enough time to internalize it all. This was only my second time playing a night scenario, my first time with gliders, my first time on Pegasus Bridge, and I'd only seen the PB SSRs about five minutes before we started play.
So our rules interpretations were certainly creative at some points, unorthodox at others, and out and out wrong at least once.
Of course, that didn't stop us from having a whole lot of fun.
PB1 Ham and Bloody Jam
This is a scenario that appeals to me for a number of reasons. Probably better than any other scenario I've played, it takes a very specific, memorable, and important action and commits it to cardboard form. It requires audacity on the part of the attacker and careful planning by the defense. Sure there's a few rules to learn, but that's never stopped me before....
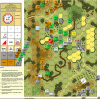
The German defense was weighted to the East side of the Canal. Wire blocked the approach from North of the Road. Trenches were set up just to the South. Cafe Gondree and Cafe Picot were both garrisoned, as were Z20, the Pillbox, and the Trenches.
As British, there are two elements to the plan of attack: Who goes in which glider, and where the Intended Landing Hexes are going to go. I opted for a fairly balanced loading, and turned the audacity up to the max by aiming the gliders for the road just East of the bridge (Y21, Y22, Y23. We'd both missed the SSR that adds +1 to Landing DRs. Given the same setup and knowledge of that SSR, I'd probably call it W21, W22, and either X23 or Y22, trenches and their possible garrisons be damned).
This is where a second misunderstanding came into play. We hadn't understood correctly what happens to the occupants of a damaged glider, and assumed that it was much more lethal that it actually is. Consequentially, we played with a mulligan rule I'd heard about on the ASL Scenario Archive that essentially says that if the British don't get at least two gliders down intact, start over. In retrospect, this probably isn't necessary, and it allows the British player to be far more aggressive with the glider landings than otherwise sensible.
Even with the mulligan, one glider came down hard, with one squad reduced and a leader broken.
The survivors abandoned their gliders and set to work clearing the defenses. A series of sharp fights broke out, decided by point blank range gunfire and hand grenades over the course of the first APh and CCPh. By the end of British Turn 1, the first of the sappers had made it to the bridge.
By the end of Turn 2, the East bank of the canal was completely in British hands, and sappers started their work cutting wires running to the demolition pans.
Turns 3 and 4 were marked by repeated attempts by the British to force their way across the bridge against heavy fire from Cafe Gondree and Cafe Picot. Ultimately these attempts proved successful, though only because the cover of darkness prevented what would have doubtless been a costly route back to the East bank of the canal. At the end of Turn 4, Cafe Picot fell to the British, who then turned their attention South towards Cafe Gondree. The sappers continued their work throughout, the attempts to cross the bridge drawing fire that might otherwise have been directed their way.
The Cafe Gondree strong point (now a 2-3-6 and and LMG) couldn't hold out long against the combined attention of nearly a company of British airborne. They broke under fire, becoming disrupted in the process. At this point, it was pretty much game over. The British were guaranteed to take Cafe Gondree at the end of the turn. All that was left to do was to see if the sappers had completed their work.
The roll was a 3 and the sappers announced, after 4 turns of hard work under fire, that the demolition pans were empty.
Is it dicey? Yes. The glider landings and the need to clear the bridge see to that.
Is it a good way to learn night and glider rules? Yes.
Does it capture the drama of the first minutes of D-Day? Yes.
Is it fun? Absolutely.
Would I play it again? In a heartbeat.
PB3 Piecemeal
The scene shifted now to Benouville, in the early morning hours. On the one hand, we weren't under night rules any more. On the other, a +1 LV hindrance was in effect for the duration.
The Germans (this time elements of Panzer Division 21) were counterattacking through Benouville towards the bridge. The men of the 6th Airborne needed to hold them off. The Germans have two paths to victory-- either by exiting via the North edge between T10 and T18, or by scoring at least 10 CVP.
Despite the very tight record (now 42-40 pro British), I think the defense has a hard task. There just isn't much cover in the back field, route paths aren't quite what I'd like them to be, and the Germans have just enough men to keep the pressure on everywhere all at once. To top it off, the LV hindrance gives the Germans some movement options they otherwise wouldn't have.
Not wanting to be immediately overwhelmed, I set up roughly along hexrow J and K, with a reserve in building N11. Thinking about it now, this may have been a bit too far back-- an outpost or two in hexrow I could have done some pretty nasty damage to German troops as they attempted to cross Rue du Grand Clos.
The German attack came in two phases. The first, from roughly Turns 1-4, was defined by an attempt to grind through the village itself to win by CVP. The fighting in Benouville was not so much house to house (after all, the visibility wasn't all that great out of doors) as room to room.
Two massive melees developed, in K10 and K12. The K10 melee lasted almost three full turns as a squad and a half worth of airborne desperately fought against the better part of a platoon of Panzergrenadiers. They died fighting, but took more than their number with them, whittling the Germans down by a half squad or two as each turn passed.
By the beginning of Turn 5, the British defense had been subtly shifted Eastward. This is when phase two kicked in, and the Germans switched to an end run down Avenue de Caen. Two FlaK LKWs were able to exit almost unopposed, and infantry made it as far as R10 before the British were able to pull back far enough to put fire on the road.
It turned out to not be enough. Despite a few breaks and one Pin, the British just weren't able to throw enough firepower at the German exit corridor. A squad and a half were able to exit through a hail of residual firepower, and an 8-0 leader was able to make it right to the board edge, to exit in the APh.
This is one that I'm glad I played, but I won't be in a hurry to play again. If it hadn't been a Pegasus Bridge scenario, I probably wouldn't have given it a second glance.
One possibility that I only belatedly considered is that the classic defense for Gavin Take might also be applicable here. A couple of squads entrenched in T11 and T12 would suddenly make the exit condition look very unappealing.
Thank Yous!
Thanks to
@Matt Boehland for two crazy, exhausting, and ultimately fantastic games.
Thanks also to
@jrv -- without "Bring On The Night," this never would have been possible.