Mike205
Senior Member
- Joined
- Jul 7, 2017
- Messages
- 150
- Reaction score
- 301
- Country
-

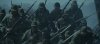
So much carnage.
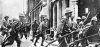
In our final game of the holiday weekend, Doug and I broke out this scenario from the latest issue of Le Franc Trieur. It’s a particularly interesting one that examines the 1943 Japanese attempt to annex Italian holdings in China after the armistice. A mixed group of plucky Italian marines fights to hold off a numerically superior IJA force in the port city of Tianjin.
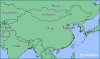
The map choices for this scenario were exceptional and I think really captured the atmosphere. Consisting of boards 8, 45, and 49, they depict the foreign nationals quarter of the city, surrounded by some suburbs and flanked by a tributary flowing out to port. There are two overlays on board 45 – OG 3, which is placed over the 45I6-I7 building, and X20, which is placed on 45R7-S8. This latter overlay further enhanced the feel of the mapboard, as it depicts what might be a hospital, or perhaps even a Jesuit missionary, given the location, complete with steeple. The VC locations that the Japanese must take are the 45 J3, N8, P4 buildings which formed an administrative hub. We nicknamed them the chancellery, barracks, and officers’ quarters respectively.
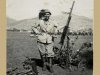
I diced as the defending Italians. My force comprised 9x 4-4-7s, 5x 3-4-6s, 3 x 2-2-7s, led by 9-1, 8-1, and 6+1 leaders, generously supported by a lot of SWs. They got a hmg, 3 mmgs, 2 lmgs, and 2 75L AA guns, plus ten dummy counters and 2 armored cars. Fortifications consisted of four sangar counters and six wire counters.
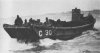
Doug received a horde of 17x 3-4-7s and 4x 2-2-8s, led by a 9-1, 9-0, and 8-0. SW consisted of 2 mmgs, 2 lmgs, 2 light mtrs, 1 70 mm Infantry gun and 1 75 mm artillery piece. The latter can only set up in open or road hexes on board 49, per SSR. The IJA also get six dummy counters, 3 light tanks, 2 armored cars, and a Daihatsu landing craft. Despite soft garrison duty on the Chinese coast they were ready to prove themselves to the emperor.
To counter the horde, inside the chancellery, which would face the brunt of any board 45 attack, I placed 1 mmg on the top floor of 45J2, and another lmg and squad on the second floor of K2. On the bottom floor I placed a mixture of elite and first line squads in I4(with mmg)&5, K2, and some dummies in L2.
The P4 VL was garrisoned by an elite squad, mmg, and 8-1 leader in the upper level of O4, two first line squads in P3&O4. One elite and one first line squad went in R2&S3 respectively. A dummy stack covered the T1 road in U2.
Closer to the water, one AA gun set up in 8S9, CA facing R9, the second AA gun set up in P2, CA facing P3. Both guns intended to cover the approach to a possible O3 landing hex. The 6+1 leader was given his own special mission and was placed in a sangar with a 3-4-6 and lmg to provide point blank fire to anyone who landed in O3 and attempted to advance via this backdoor to the 45N8 VL. My HMG also covered this landing area, setting up in the upper story of 45Q9.
I placed a final elite squad, lmg, and 1st line unit in the 45N8 building. Dummy stacks were placed in 45E8 and F6. Wire blocked entry to the quarter and was placed in 45C8, D6, K1, Q3, T2, and V1. My armored cars set up in W4-X4 in case Doug tried to outlank my line. However, give the time crunch (5.5 turns) I figured he’d launch a direct assault.
My suspicions proved correct. Things opened with a bang. Literally. Doug’s first prep fire- a shot from the 70 INF gun, scored a critical hit on my mmg toting squad on the upper level of J3, rubbling the hex and burying the mmg and squad. Fortunately other prep fires failed to do much, other than strip concealment on a squad in 45Q4 and the knee mortars popped a couple WP rounds to cover the advance. Six of Doug’s squads led by his 9-1 leader came gallivanting onto board 45 via the B5 road and CXing, worked their way over the E4-5 stone wall. Another force came assault moving in from the north, into the 49J10 woods. My defensive fire revealed a line of dummies, and I figured I’d have to keep a close eye on the stack following behind them in the future. Meanwhile three IJA squads started hustling across the M5-O4 stone wall and paid for it. My IFT rolls were hot and one died while the other two were striped. The 8-0 leader and three squads crossed the S1 road. The leader was wounded but they and managed to weather the fire to advance into CC in R2 & S3, killing both Italian squads.
To the south, the Daihatsu steamed downriver and took a hit from a 75AA gun before disembarking its passengers in 8O2, where they were immediately raked by my HMG team in 45Q9.
Everyone striped and the leader died on a K/2. The P2 AA crew broke in the AfPh and later died when I rolled boxcars. I seem to be averaging one boxcar roll a game lately.
My turn 1 I eliminated the survivors hunkered down along the 45O4 wall but otherwise didn’t accomplish all that much since I was trading shots with either concealed squads or units in stone buildings. I rolled my ACs over to the stonewall, in the hope of preventing any other incursions across that route.
Turn 2 Doug launched a banzai that carried his 9-1 assault force across the open ground in 45G4 and over the G5 hedge. Although weakened, his force poured over the chancellery’s back patio and into close combat with the defenders. Another stack infiltrated the northern part of the building via the board 49 woods and eliminated my first line squad guarding the ground floor.
To the northeast, the three squads in the R2 building fought their way into R4, losing one squad in the process. The others were striped. Enduring massive fire from the 6+1 lmg stack and hmg, the remaining HS of the landing team went into CC. Only Mr. 6+1 would survive, to be forever haunted by his adventure to the Orient.
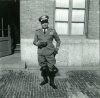
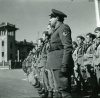
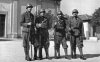
Colonel Pasquale Vittorio in happier times.
The IJA tanks puttered forward to support the teams that had fought their way into R4 and the armored cars rolled into position and began trading shots with their Italian counterparts. An Italian sniper waxed the wounded IJA 8-0.
Melees continued in I4 & I5 through Italian turn 3. As these squads desperately slugged it out, Doug raked together a small reserve force of a couple of HS and a mmg crew, and also moved one squad upstairs, where it broke my remaining 4-4-7 and lmg. He also killed another squad in CC in C4 and my 8-1 and accompanying 4-4-7 broke under concentrated fire from Doug’s tanks. By turn 4 Doug’s samurai had, at cost, taken the 45J3 VL and, if he could shift forces, might grab N8 since it garrison now consisted of a sole 4-4-7 and mmg since my 8-1 and other 4-4-7 failed to rally.
This was when Doug went all in, launching a three and a half squad banzai across the L3-O4 open ground. Despite laying down two intersecting firelanes, my ACs, and pointblank fire from the 4-4-7 in O4 he drove his screaming two squads of survivors into CC, killing the 4-4-7. I was momentarily stunned by this display of bravery and rolled a personal morale check. Passing it, I started to hustle my HMG into the final VL because, hey- who knew what could happen next? My AA gun in S9 swiveled to cover the R8 boulevard as well.
In the end, knowing that he was running out of time, Doug adhered to the code of Bushido and launched his 9-1 and two striped squads into one final banzai.
Although my AA malf’ed, this time they died crossing a fire lane and enduring point blank FPF shots. I was able to eke out a win.
When the cordite fumes settled Doug and I took stock. Out of 17x3-4-7s, 16 had been eliminated and only two HS, one broken, remained, alongside 3x 2-2-8s. None of his leaders survived.
My force wasn’t in much better shape. Two of my nine 4-4-7s and 2&1/2 of my 3-4-6s were still standing, along with 2x 2-2-7 crews. My 6+1 and 8-1 did live to see the handover ceremony a few days later. Italian honor was intact, if nothing else.
Most of these casualties came from CCs and the game produced some really tense, wild moments that brought out some of the best, and worst, of the IJA characteristics. I haven’t played much as the Italians and I was pleasantly surprised at how well they stood up to a tough opponent and dished out some devastating and accurate fire. I don’t think either of us were clear on how to play the AFVs in this one since all of them only packed CMGs, which had little to no effect on troops in stone buildings. We both agreed that the Daihatsu was a nice touch that offers the IJA a bit of tactical flexibility.
This was a great scenario start to finish and in both character and play stood out against many of the other games we’ve played recently. This was my second from LFT 14 and so far it hasn’t disappointed. I’m looking forward to playing the Italians more in ASL.
In our final game of the holiday weekend, Doug and I broke out this scenario from the latest issue of Le Franc Trieur. It’s a particularly interesting one that examines the 1943 Japanese attempt to annex Italian holdings in China after the armistice. A mixed group of plucky Italian marines fights to hold off a numerically superior IJA force in the port city of Tianjin.
The map choices for this scenario were exceptional and I think really captured the atmosphere. Consisting of boards 8, 45, and 49, they depict the foreign nationals quarter of the city, surrounded by some suburbs and flanked by a tributary flowing out to port. There are two overlays on board 45 – OG 3, which is placed over the 45I6-I7 building, and X20, which is placed on 45R7-S8. This latter overlay further enhanced the feel of the mapboard, as it depicts what might be a hospital, or perhaps even a Jesuit missionary, given the location, complete with steeple. The VC locations that the Japanese must take are the 45 J3, N8, P4 buildings which formed an administrative hub. We nicknamed them the chancellery, barracks, and officers’ quarters respectively.
I diced as the defending Italians. My force comprised 9x 4-4-7s, 5x 3-4-6s, 3 x 2-2-7s, led by 9-1, 8-1, and 6+1 leaders, generously supported by a lot of SWs. They got a hmg, 3 mmgs, 2 lmgs, and 2 75L AA guns, plus ten dummy counters and 2 armored cars. Fortifications consisted of four sangar counters and six wire counters.
Doug received a horde of 17x 3-4-7s and 4x 2-2-8s, led by a 9-1, 9-0, and 8-0. SW consisted of 2 mmgs, 2 lmgs, 2 light mtrs, 1 70 mm Infantry gun and 1 75 mm artillery piece. The latter can only set up in open or road hexes on board 49, per SSR. The IJA also get six dummy counters, 3 light tanks, 2 armored cars, and a Daihatsu landing craft. Despite soft garrison duty on the Chinese coast they were ready to prove themselves to the emperor.
To counter the horde, inside the chancellery, which would face the brunt of any board 45 attack, I placed 1 mmg on the top floor of 45J2, and another lmg and squad on the second floor of K2. On the bottom floor I placed a mixture of elite and first line squads in I4(with mmg)&5, K2, and some dummies in L2.
The P4 VL was garrisoned by an elite squad, mmg, and 8-1 leader in the upper level of O4, two first line squads in P3&O4. One elite and one first line squad went in R2&S3 respectively. A dummy stack covered the T1 road in U2.
Closer to the water, one AA gun set up in 8S9, CA facing R9, the second AA gun set up in P2, CA facing P3. Both guns intended to cover the approach to a possible O3 landing hex. The 6+1 leader was given his own special mission and was placed in a sangar with a 3-4-6 and lmg to provide point blank fire to anyone who landed in O3 and attempted to advance via this backdoor to the 45N8 VL. My HMG also covered this landing area, setting up in the upper story of 45Q9.
I placed a final elite squad, lmg, and 1st line unit in the 45N8 building. Dummy stacks were placed in 45E8 and F6. Wire blocked entry to the quarter and was placed in 45C8, D6, K1, Q3, T2, and V1. My armored cars set up in W4-X4 in case Doug tried to outlank my line. However, give the time crunch (5.5 turns) I figured he’d launch a direct assault.
My suspicions proved correct. Things opened with a bang. Literally. Doug’s first prep fire- a shot from the 70 INF gun, scored a critical hit on my mmg toting squad on the upper level of J3, rubbling the hex and burying the mmg and squad. Fortunately other prep fires failed to do much, other than strip concealment on a squad in 45Q4 and the knee mortars popped a couple WP rounds to cover the advance. Six of Doug’s squads led by his 9-1 leader came gallivanting onto board 45 via the B5 road and CXing, worked their way over the E4-5 stone wall. Another force came assault moving in from the north, into the 49J10 woods. My defensive fire revealed a line of dummies, and I figured I’d have to keep a close eye on the stack following behind them in the future. Meanwhile three IJA squads started hustling across the M5-O4 stone wall and paid for it. My IFT rolls were hot and one died while the other two were striped. The 8-0 leader and three squads crossed the S1 road. The leader was wounded but they and managed to weather the fire to advance into CC in R2 & S3, killing both Italian squads.
To the south, the Daihatsu steamed downriver and took a hit from a 75AA gun before disembarking its passengers in 8O2, where they were immediately raked by my HMG team in 45Q9.
Everyone striped and the leader died on a K/2. The P2 AA crew broke in the AfPh and later died when I rolled boxcars. I seem to be averaging one boxcar roll a game lately.
My turn 1 I eliminated the survivors hunkered down along the 45O4 wall but otherwise didn’t accomplish all that much since I was trading shots with either concealed squads or units in stone buildings. I rolled my ACs over to the stonewall, in the hope of preventing any other incursions across that route.
Turn 2 Doug launched a banzai that carried his 9-1 assault force across the open ground in 45G4 and over the G5 hedge. Although weakened, his force poured over the chancellery’s back patio and into close combat with the defenders. Another stack infiltrated the northern part of the building via the board 49 woods and eliminated my first line squad guarding the ground floor.
To the northeast, the three squads in the R2 building fought their way into R4, losing one squad in the process. The others were striped. Enduring massive fire from the 6+1 lmg stack and hmg, the remaining HS of the landing team went into CC. Only Mr. 6+1 would survive, to be forever haunted by his adventure to the Orient.
Colonel Pasquale Vittorio in happier times.
The IJA tanks puttered forward to support the teams that had fought their way into R4 and the armored cars rolled into position and began trading shots with their Italian counterparts. An Italian sniper waxed the wounded IJA 8-0.
Melees continued in I4 & I5 through Italian turn 3. As these squads desperately slugged it out, Doug raked together a small reserve force of a couple of HS and a mmg crew, and also moved one squad upstairs, where it broke my remaining 4-4-7 and lmg. He also killed another squad in CC in C4 and my 8-1 and accompanying 4-4-7 broke under concentrated fire from Doug’s tanks. By turn 4 Doug’s samurai had, at cost, taken the 45J3 VL and, if he could shift forces, might grab N8 since it garrison now consisted of a sole 4-4-7 and mmg since my 8-1 and other 4-4-7 failed to rally.
This was when Doug went all in, launching a three and a half squad banzai across the L3-O4 open ground. Despite laying down two intersecting firelanes, my ACs, and pointblank fire from the 4-4-7 in O4 he drove his screaming two squads of survivors into CC, killing the 4-4-7. I was momentarily stunned by this display of bravery and rolled a personal morale check. Passing it, I started to hustle my HMG into the final VL because, hey- who knew what could happen next? My AA gun in S9 swiveled to cover the R8 boulevard as well.
In the end, knowing that he was running out of time, Doug adhered to the code of Bushido and launched his 9-1 and two striped squads into one final banzai.
Although my AA malf’ed, this time they died crossing a fire lane and enduring point blank FPF shots. I was able to eke out a win.
When the cordite fumes settled Doug and I took stock. Out of 17x3-4-7s, 16 had been eliminated and only two HS, one broken, remained, alongside 3x 2-2-8s. None of his leaders survived.
My force wasn’t in much better shape. Two of my nine 4-4-7s and 2&1/2 of my 3-4-6s were still standing, along with 2x 2-2-7 crews. My 6+1 and 8-1 did live to see the handover ceremony a few days later. Italian honor was intact, if nothing else.
Most of these casualties came from CCs and the game produced some really tense, wild moments that brought out some of the best, and worst, of the IJA characteristics. I haven’t played much as the Italians and I was pleasantly surprised at how well they stood up to a tough opponent and dished out some devastating and accurate fire. I don’t think either of us were clear on how to play the AFVs in this one since all of them only packed CMGs, which had little to no effect on troops in stone buildings. We both agreed that the Daihatsu was a nice touch that offers the IJA a bit of tactical flexibility.
This was a great scenario start to finish and in both character and play stood out against many of the other games we’ve played recently. This was my second from LFT 14 and so far it hasn’t disappointed. I’m looking forward to playing the Italians more in ASL.