Major Issues
Elder Member
Jim has been wanting to play a desert scenario. We haven’t done one together since Perry was still good looking.
After being released from questioning over my role in the Notre Dame fire, we were finally able to get together. He chose Turning The Tables, as he was looking for a really long scenario that used the greatest possible number of overlays. He wanted to defend as the British.
The board is mostly sand and sand dunes. There is more sand here than at Wildwood. But in Libya, you don’t need beach tags.
British get millions of known mines and a bunch of wire. Jim had mines across almost the entire board. Some hexes had wire instead. There was another line of wire in the middle of the board. VC are exit points. I needed a brilliant plan to make it through all of the obstacles.

"We'll just pull with the left guard, do a double reverse, hand it back off to the tight end, and let him run down the sideline for the TD!!!"
Evil Nazis get a handful of squads with every kind of MGs, 2 light mortars, 2 PzJg Is, and 2 SPW 251/1s. 2 Stukas are available from the beginning. I left all of the AFVs offboard, along with 3 squads and the sniper-inducing mortars. My plan was to run up a bunch of sappers to clear a path in the minefield, then run the loaded HTs and AFVs off the board for the win. The big threats the British have are a HMG, a 40mm AA, and a 40mm AT. Germans get a 10-2, many, many MGs, including two HMGs, and Sun Blindness. Since the supply ship with the Ray-Bans had not yet arrived, the British would have a +2 drm shooting at me.
I chose the minefield hex on my far left as the one to remove. HMGs and MMGs went the same direction to knock out the infantry.
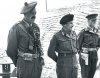
I got a 9-1 and 5 HSs, 4 of which were sappers, into the minefield. But two of the sappers broke from puny minefield attacks, and popped right back out. Meanwhile, the dune in front of me had Major Wesley Foulacre-Ffinch and his HMG. (For the record, one ‘f’ is silent, so it is pronounced ‘Finch’. Unless you stutter.)
His shooting just pins a squad.
Next turn, one of my HMG squads went Berserk, dropped his MG, ran halfway through a minefield, then had 6 guys lose legs on the way out. The remaining HS made it into a Sangar hex, but was eliminated in CC.
What followed was 5 turns of drudgery. I would fire giant fire groups of MGs at him, which usually did little. He would shoot back at me, and do nothing. I would try to clear mines, and roll 10s. Except for one time, when I rolled a 12 and Lt. Mueller lost a foot. Major Wesley Foulacre-Ffinch broke, stayed broken for a while, Battle Hardened to a 9-2, broke, wounded, and ELRed back to a 9-1, and eventually passed from this mortal coil. 4 British squads and a 7-0 were also eliminated.
Jim couldn’t move much for fear of Stukas, and because the front line is at an angle, most of his troops were way out of range. So he would take one or two shots if there was anyone still Good Order, otherwise just AM a couple squads in the right direction. My Stukas did not attempt an attack. Their MGs are only 4 FP, and attacks at 4 +2 + dust did not seem worthwhile. I didn’t want them shot down or recalled, preferring to hold them – and their bombs and automatic Pins – for when I could use them against the guns.
Eventually, and only with the addition of the 10-2 and a full squad, I was able to clear a path in the minefield.
My vehicles roar in, heading down the left edge. The PzJg Is only have to worry about Bog in the one Sand hex. The HTs have about 47 Bog hexes, mostly Adjacent To Sand, to worry about. And this is what I thought was the safest way. But, luckily, I pass all of the Bog checks.
My infantry pours through the gap, and I find out that what I thought were dummy counters are two 457s. They break a HS and pin another. Fear keeps me from running people into the 4 residual hexes.
The AA gun opens up and takes out a PzJg I. The AT gun opens up from the other side of the board, and misses. I wanted to try to use vehicle dust to cover the vehicles. One HT can take advantage of the dust, and the remaining PzJg I has pretty much made it out of LOS. But there is still one HT that is vulnerable.
Which the AT gun nailed in Jim’s Prep Fire. And kept rate, again and again and again, until he finally nailed the other HT.
Game over. I needed three of the four vehicles to get off. Had Jim missed in PF, I may have been able to take out the guns in DF with the 10-2 and the Stukas. One of the provisions of the VC is that the Germans can’t have lost more than 5 CVPs than the British. I lost only the Berserker of my initial infantry force, and got 11 CVPs, but the loss of the vehicles gave Jim 25 CVPs. No way I was going to be able to make up that difference.
This ended British turn 8. If I had been able to clear the mines faster, I may have been able to find a gun with the infantry, or have infantry exit more of a threat.
Maybe it’s better to use the Stukas early and often, just to try to coax the AA gun out of hiding.
There’s a lot of things that can keep the vehicles from being able to exit. Sand bog, Hammada bog, Wire bog, Trench bog, AT mines, MGs, ATRs, light mortars, AA gun, AT gun, snipers, red MPs... it’s enough to give a halftrack driver the willies. Had the HTs survived the turn, they were still looking at several more Bog checks each, with an 11 or 12 causing Bog.
This only took us 4 hours, mostly because there were a lot of turns with very little happening. It was a boring game for most of the time, and Jim was getting down watching the Major get shot at without being able to do anything back. I was getting down rolling 10s on my mine clearance attempts.
Major Wesley Foulacre-Ffinch. 3rd Earl of Dorchester, former captain of the Eton polo team, member of The Falstaff Club in London, expert fencer and canasta player. He will be missed.
After being released from questioning over my role in the Notre Dame fire, we were finally able to get together. He chose Turning The Tables, as he was looking for a really long scenario that used the greatest possible number of overlays. He wanted to defend as the British.
The board is mostly sand and sand dunes. There is more sand here than at Wildwood. But in Libya, you don’t need beach tags.
British get millions of known mines and a bunch of wire. Jim had mines across almost the entire board. Some hexes had wire instead. There was another line of wire in the middle of the board. VC are exit points. I needed a brilliant plan to make it through all of the obstacles.
"We'll just pull with the left guard, do a double reverse, hand it back off to the tight end, and let him run down the sideline for the TD!!!"
Evil Nazis get a handful of squads with every kind of MGs, 2 light mortars, 2 PzJg Is, and 2 SPW 251/1s. 2 Stukas are available from the beginning. I left all of the AFVs offboard, along with 3 squads and the sniper-inducing mortars. My plan was to run up a bunch of sappers to clear a path in the minefield, then run the loaded HTs and AFVs off the board for the win. The big threats the British have are a HMG, a 40mm AA, and a 40mm AT. Germans get a 10-2, many, many MGs, including two HMGs, and Sun Blindness. Since the supply ship with the Ray-Bans had not yet arrived, the British would have a +2 drm shooting at me.
I chose the minefield hex on my far left as the one to remove. HMGs and MMGs went the same direction to knock out the infantry.
I got a 9-1 and 5 HSs, 4 of which were sappers, into the minefield. But two of the sappers broke from puny minefield attacks, and popped right back out. Meanwhile, the dune in front of me had Major Wesley Foulacre-Ffinch and his HMG. (For the record, one ‘f’ is silent, so it is pronounced ‘Finch’. Unless you stutter.)
His shooting just pins a squad.
Next turn, one of my HMG squads went Berserk, dropped his MG, ran halfway through a minefield, then had 6 guys lose legs on the way out. The remaining HS made it into a Sangar hex, but was eliminated in CC.
What followed was 5 turns of drudgery. I would fire giant fire groups of MGs at him, which usually did little. He would shoot back at me, and do nothing. I would try to clear mines, and roll 10s. Except for one time, when I rolled a 12 and Lt. Mueller lost a foot. Major Wesley Foulacre-Ffinch broke, stayed broken for a while, Battle Hardened to a 9-2, broke, wounded, and ELRed back to a 9-1, and eventually passed from this mortal coil. 4 British squads and a 7-0 were also eliminated.
Jim couldn’t move much for fear of Stukas, and because the front line is at an angle, most of his troops were way out of range. So he would take one or two shots if there was anyone still Good Order, otherwise just AM a couple squads in the right direction. My Stukas did not attempt an attack. Their MGs are only 4 FP, and attacks at 4 +2 + dust did not seem worthwhile. I didn’t want them shot down or recalled, preferring to hold them – and their bombs and automatic Pins – for when I could use them against the guns.
Eventually, and only with the addition of the 10-2 and a full squad, I was able to clear a path in the minefield.
My vehicles roar in, heading down the left edge. The PzJg Is only have to worry about Bog in the one Sand hex. The HTs have about 47 Bog hexes, mostly Adjacent To Sand, to worry about. And this is what I thought was the safest way. But, luckily, I pass all of the Bog checks.
My infantry pours through the gap, and I find out that what I thought were dummy counters are two 457s. They break a HS and pin another. Fear keeps me from running people into the 4 residual hexes.
The AA gun opens up and takes out a PzJg I. The AT gun opens up from the other side of the board, and misses. I wanted to try to use vehicle dust to cover the vehicles. One HT can take advantage of the dust, and the remaining PzJg I has pretty much made it out of LOS. But there is still one HT that is vulnerable.
Which the AT gun nailed in Jim’s Prep Fire. And kept rate, again and again and again, until he finally nailed the other HT.
Game over. I needed three of the four vehicles to get off. Had Jim missed in PF, I may have been able to take out the guns in DF with the 10-2 and the Stukas. One of the provisions of the VC is that the Germans can’t have lost more than 5 CVPs than the British. I lost only the Berserker of my initial infantry force, and got 11 CVPs, but the loss of the vehicles gave Jim 25 CVPs. No way I was going to be able to make up that difference.
This ended British turn 8. If I had been able to clear the mines faster, I may have been able to find a gun with the infantry, or have infantry exit more of a threat.
Maybe it’s better to use the Stukas early and often, just to try to coax the AA gun out of hiding.
There’s a lot of things that can keep the vehicles from being able to exit. Sand bog, Hammada bog, Wire bog, Trench bog, AT mines, MGs, ATRs, light mortars, AA gun, AT gun, snipers, red MPs... it’s enough to give a halftrack driver the willies. Had the HTs survived the turn, they were still looking at several more Bog checks each, with an 11 or 12 causing Bog.
This only took us 4 hours, mostly because there were a lot of turns with very little happening. It was a boring game for most of the time, and Jim was getting down watching the Major get shot at without being able to do anything back. I was getting down rolling 10s on my mine clearance attempts.
Major Wesley Foulacre-Ffinch. 3rd Earl of Dorchester, former captain of the Eton polo team, member of The Falstaff Club in London, expert fencer and canasta player. He will be missed.
")